
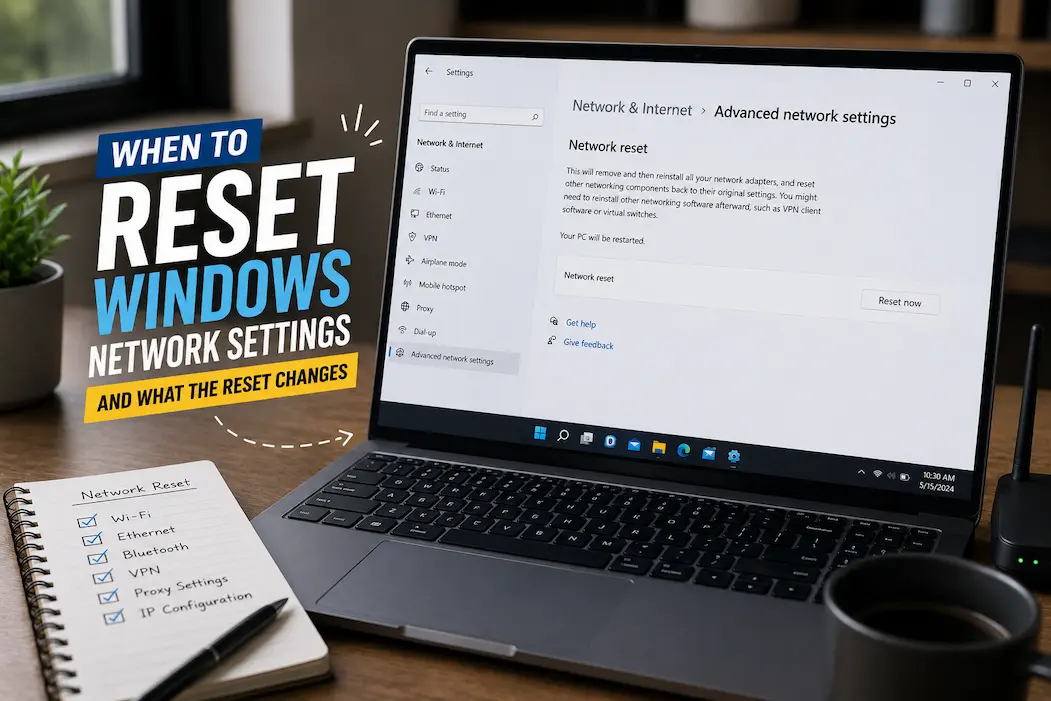
A Windows network problem can be surprisingly difficult to diagnose because several different things sit between the computer and the internet. The Wi-Fi connection may appear connected while websites refuse to open. A computer might connect to one network but not another. An application may report that it has no internet access even though the browser works. Sometimes the problem disappears after a restart and then returns later.
In these situations, Network reset can be useful, but it should not be treated as a general-purpose speed boost or a first response to every connection problem. The feature is designed to remove and reinstall network adapters and return certain networking components to their default configuration. That can clear a damaged or unusual configuration, but it also means you may have to reconnect to networks and reconfigure certain software afterward.
Knowing what the reset actually changes makes the decision much easier. You can then use it when the problem matches what the reset is capable of fixing rather than pressing the button simply because Windows says the connection is having trouble.
What Windows Network Reset Is Actually For
Network reset is a recovery option built into Windows for situations where normal troubleshooting has not resolved a network problem. In current Windows versions, it is available through Settings > Network & internet > Advanced network settings > Network reset.
The feature is deliberately broader than restarting your Wi-Fi connection. Windows removes installed network adapters and their settings, then reinstalls the adapters after the computer restarts. Microsoft describes Network reset as a step to use after trying other troubleshooting methods because it can require you to set up networking-related software again.
That makes it useful when the networking configuration itself has become problematic. It is less useful when the real cause is a faulty router, weak Wi-Fi signal, an internet service outage, or a website that is unavailable.
The reset is therefore best viewed as a configuration reset, not an internet repair button.
Situations Where a Network Reset Makes Sense
There are several situations where resetting Windows networking is reasonable.
One example is when a computer repeatedly fails to connect to networks despite otherwise normal hardware and a series of simpler troubleshooting steps. Another is when Windows networking started behaving strangely after software changes, configuration changes, or an update and ordinary troubleshooting has not restored normal behavior.
It can also make sense when network adapters appear to be behaving incorrectly and reinstalling or correcting them individually has not solved the issue. If Windows has accumulated a problematic network configuration, returning the networking components to a clean state can remove that complication.
The important part is timing. Network reset generally belongs toward the end of ordinary troubleshooting, not at the beginning.
When You Probably Shouldn’t Use It
A network reset is unlikely to fix a problem that exists outside the computer.
If your router has lost its internet connection, resetting Windows networking will not repair the router. If every device connected to your home network is unable to access the internet, investigate the router, modem, or internet service before changing Windows.
Likewise, if your Wi-Fi signal is extremely weak in a particular room, network reset will not improve the physical signal. Moving closer to the access point, improving wireless coverage, or investigating interference would make more sense.
The same applies to a service outage. If a particular website or online service is unavailable for everyone, changing your computer’s network configuration is unlikely to help.
Try the Less Disruptive Steps First
Before using Network reset, restart the computer and networking equipment if appropriate. Check whether another device can connect to the same network. Confirm that Wi-Fi is enabled and that the correct network is selected.
Windows also includes its own network troubleshooting and diagnostic tools. Depending on your Windows version, you may find relevant options under Settings > System > Troubleshoot > Other troubleshooters or within the network settings themselves.
If the problem affects only one website, application, or service, investigate that specific service rather than assuming the entire Windows networking stack is broken.
These checks are valuable because they help identify the location of the problem. If your phone works perfectly on the same Wi-Fi network while your Windows computer cannot connect, the computer becomes a stronger suspect. If nothing in the house can connect, the computer is much less likely to be the root cause.
What Network Reset Changes
The most important thing to understand is that Network reset does not simply forget your current Wi-Fi connection.
Windows removes installed network adapters and their settings and then reinstalls the adapters after the computer restarts. This can include both physical and virtual networking components depending on the configuration. Microsoft warns that networking software such as VPN clients or virtual switches may need to be reconfigured afterward.
That is why you should treat the reset as a meaningful system change rather than a harmless troubleshooting shortcut.
A reset can clear configuration that has become problematic, but it can also remove configuration that you intentionally created.
Your Wi-Fi Networks May Need to Be Set Up Again
After a network reset, you may need to reconnect to wireless networks.
That means you should make sure you know the password for the Wi-Fi network you normally use before starting. If you work in an office, school, hotel, or other environment that uses a more complicated authentication system, you may also need information from the network administrator.
This is one reason Network reset can be inconvenient on a computer that regularly connects to several different networks. The reset is not designed to preserve every custom networking arrangement exactly as it was.
If the only problem is that one Wi-Fi network has stopped connecting, forgetting that network and reconnecting to it may be a much smaller intervention.
VPN Software May Need Attention
VPN applications can install their own network adapters, filters, or other components. A network reset can affect these components.
If you use a VPN for work, security, or access to a private network, make sure you know how to reconnect it before performing the reset. You may need to reopen the VPN application, repair its installation, reinstall a component, or contact whoever manages the VPN.
This is particularly important for work computers. A person working remotely may depend on a VPN or other networking software that is not obvious from the standard Wi-Fi settings.
A network reset should therefore be planned rather than performed impulsively in the middle of an important work session.
Virtual Networking Can Also Be Affected
Some software creates virtual network adapters. Virtual machines, virtualization platforms, containers, security software, and other specialized tools may depend on these adapters.
After a reset, such software may no longer behave exactly as it did before. The application may need to recreate its virtual adapter or restore its networking configuration.
If you use your computer only for ordinary browsing, email, documents, and streaming, this may never become an issue. If the computer is used for development, testing, virtualization, or network administration, check the software’s documentation before performing a reset.
The broader lesson is simple: the more customized your networking environment is, the more carefully you should consider Network reset.
What Network Reset Does Not Do
Network reset does not magically improve your internet service.
It does not increase your broadband speed, improve your router’s Wi-Fi coverage, repair a damaged Ethernet cable, fix an ISP outage, or make a distant website’s servers respond faster.
It also should not be confused with resetting the router itself. The Windows feature affects networking on the computer; it does not restore the router to factory settings.
This distinction prevents a lot of unnecessary troubleshooting. If the underlying problem is outside Windows, repeatedly resetting the computer’s network configuration only creates additional work.
Resetting Network Settings Is Not the Same as Resetting Windows
The word “reset” can make the feature sound more destructive than it actually is.
A Windows Network reset is not the same as Reset this PC. It does not reinstall Windows or remove your personal files. It specifically targets networking components and their configuration.
That said, it is still disruptive enough to deserve some preparation. You may lose custom networking settings and need to reconnect networks or configure software again.
So there is no need to panic when you see the term “Network reset,” but there is also no reason to treat it like a harmless refresh button.
A Useful Way to Decide Whether the Reset Is Appropriate
Ask three questions before using it.
Does the problem appear to be specific to this Windows computer?
If other devices work normally on the same network, that is useful evidence that the computer may be responsible.
Have simpler fixes already failed?
If restarting, reconnecting to Wi-Fi, checking the adapter, updating relevant drivers, and basic troubleshooting have not helped, a reset becomes more reasonable.
Do you have custom networking software or settings?
If you use VPNs, virtual machines, enterprise networking, special adapters, or other advanced configurations, prepare for the possibility that they will need attention afterward.
If the answer to all three questions points toward the Windows networking configuration, Network reset becomes a more sensible next step.
What to Check Before Clicking Network Reset
A few minutes of preparation can prevent unnecessary frustration afterward.
Make sure you know:
- Your main Wi-Fi password.
- How to reconnect to important work or school networks.
- Your VPN login and configuration method.
- Whether you use virtual machines or other software with virtual network adapters.
- Which network adapter is normally used for Wi-Fi or Ethernet.
- Whether your computer has custom proxy or networking settings.
- Whether you have access to administrator credentials if required.
You should also save any work before restarting the computer. Network reset requires a restart, and the computer may be temporarily disconnected from the network during the process.
What Happens After the Reset
The exact screens can vary between Windows versions, but the general process is straightforward.
Windows applies the Network reset option, removes and reinstalls the network adapters, and restarts the computer. After Windows starts again, you may need to reconnect to your Wi-Fi network and restore networking software or settings that were removed or changed.
Do not judge the result before completing those steps. If you have not reconnected to the correct network yet, the computer obviously will not have normal internet access.
If the connection works normally afterward, you have useful evidence that something in the previous Windows network configuration may have been responsible.
If nothing changes, that is useful information too. It suggests the problem may be elsewhere.
If the Reset Doesn’t Fix Anything
A failed Network reset does not mean Windows networking is hopeless. It means you should reconsider the diagnosis.
Check whether the network adapter appears correctly in Device Manager. Look for warning symbols or unusual behavior. If you are using Wi-Fi, test the computer on another wireless network if possible. If you are using Ethernet, try another cable or port.
Compare behavior across devices. If another computer works on the same network but yours does not, continue investigating the Windows machine. If your computer works perfectly on a different network, the issue may involve the original router, access point, or network configuration.
You can also check whether the problem affects every application or only specific programs. A browser problem and a complete loss of network connectivity are not the same troubleshooting case.
Don’t Start Changing DNS, Proxy, and Advanced Settings Randomly
Once a network problem becomes frustrating, it is tempting to change everything at once.
You may find guides recommending new DNS servers, proxy changes, registry edits, command-line resets, firewall modifications, driver replacements, and other adjustments. Some of these steps have legitimate uses, but combining them makes it much harder to determine what actually fixed the problem.
If you have already performed a Network reset, give the fresh configuration a chance before making another series of changes.
If the problem remains, choose the next step based on the symptom. A DNS resolution problem calls for different investigation from a missing network adapter or a weak Wi-Fi signal.
Good troubleshooting narrows the possibilities. It does not simply accumulate changes.
Network Reset and Network Speed Are Two Different Things
One of the biggest misconceptions about Network reset is that it can make a slow connection faster.
Suppose your internet plan provides 100 Mbps and your computer already receives approximately that speed. Resetting Windows networking is unlikely to turn it into 300 Mbps.
If the problem is genuinely slow performance, look at the actual cause. Wi-Fi signal strength, wireless interference, router performance, network congestion, ISP limitations, background downloads, VPN routing, or the remote server may be involved.
A reset is most useful when networking is misbehaving, not when the connection is simply operating at the limits of its current conditions.
Ethernet and Wi-Fi Problems Can Point in Different Directions
If Wi-Fi fails but Ethernet works normally, investigate wireless-specific issues before assuming that all Windows networking is broken.
Conversely, if both Wi-Fi and Ethernet have trouble on the same computer, a broader Windows networking or system-level problem becomes more plausible.
Testing both connection types can therefore be a useful diagnostic step when the hardware supports it.
If only one connection method is affected, you may be able to fix the problem without resetting the entire networking configuration.
Be Careful on Managed Computers
A personal laptop and an employer-managed computer should not necessarily be treated the same way.
Business computers may have organization-specific VPNs, security software, certificates, proxies, network policies, or device-management configurations. Resetting networking can interfere with those arrangements.
If the computer belongs to an employer, school, or other organization, check with the administrator before performing a broad network reset unless their troubleshooting instructions specifically recommend it.
The same caution applies to computers used to access specialized networks where the configuration is not something you can recreate yourself.
A Better Troubleshooting Order
If Windows suddenly loses network connectivity, you can avoid unnecessary resets by working through the problem from simple to disruptive:
First, check whether other devices have internet access. This helps separate a computer problem from a network or ISP problem.
Then restart the affected computer and, where appropriate, the networking equipment. Temporary connection problems sometimes disappear here.
Check the connection type. Test Wi-Fi versus Ethernet if available.
Forget and reconnect to the affected Wi-Fi network. This is less disruptive than resetting all networking components.
Check Windows’ network adapter and troubleshooting information. Look for obvious adapter or driver problems.
Investigate application-specific issues. If only one program cannot connect, the whole Windows network stack may be fine.
Consider Network reset after these steps fail. Prepare for the settings it may remove before proceeding.
This sequence is not about making troubleshooting longer. It is about avoiding a broad reset when a smaller fix is enough.
Situations Where a Network Reset Is Reasonable
The reset becomes particularly reasonable when the symptoms point toward Windows itself and simpler interventions have failed.
For example, imagine that your phone, tablet, and another laptop connect normally to the same Wi-Fi network. Your Windows computer used to connect without problems but now repeatedly fails despite restarting, reconnecting to Wi-Fi, and checking the adapter. You do not have an unusual corporate networking setup, and you are prepared to reconnect your network afterward.
That is a much stronger case for Network reset than simply noticing that a website is loading slowly.
Another reasonable situation is when the networking configuration has become complicated after repeated troubleshooting, adapter changes, or software installations and you want to return Windows to a cleaner networking state.
Situations Where You Should Look Elsewhere
If every device in your home loses internet access, focus on the router or ISP.
If Wi-Fi works near the router but fails in another room, investigate signal coverage.
If only one website is unavailable, investigate the website or DNS behavior.
If a VPN is the only application that cannot connect, investigate the VPN.
If Ethernet works but Wi-Fi does not, investigate the wireless adapter, driver, access point, or wireless configuration.
If the computer connects but internet access is extremely slow, measure the connection and investigate bandwidth, latency, signal quality, and background activity.
The more specific the symptom, the less reason there usually is to reset everything.
Frequently Asked Questions
Will Windows Network reset delete my personal files?
No. Network reset is not the same as resetting Windows or resetting the entire PC. It targets networking components and configuration. However, it can remove networking settings and adapters, so you may need to reconnect networks and reconfigure certain software afterward.
Will Network reset delete my Wi-Fi password?
You should expect to reconnect to Wi-Fi networks after a Network reset. Make sure you know the passwords for networks you need before starting the process.
Does Network reset improve internet speed?
Not normally. It can resolve configuration problems that prevent a connection from working correctly, but it does not increase the speed provided by your internet service or improve the physical quality of your Wi-Fi signal.
Should I reset network settings every time Wi-Fi stops working?
No. Start with simpler checks such as restarting the computer, checking other devices, reconnecting to the network, and investigating the router or signal. Network reset is better reserved for persistent problems that appear to involve Windows networking.
Will a Network reset remove my VPN?
It can affect VPN software and its networking components. You may need to reconnect, repair, or reconfigure the VPN afterward. If the VPN is important for work, make sure you know how to restore it before resetting.
Can Network reset fix DNS problems?
It can clear some networking configuration issues that may be contributing to connectivity problems, but it is not a universal DNS repair. If the specific problem is DNS resolution, diagnose that issue directly rather than assuming a complete network reset is necessary.
Why does my phone have internet while my Windows PC doesn’t?
That usually suggests the router and internet service are functioning at least well enough for the phone. The Windows computer could have an adapter, configuration, driver, authentication, or software problem. It does not prove that Windows is definitely responsible, but it makes the computer a more useful place to investigate.
Reset Networking When the Problem Calls for It
Windows Network reset is useful precisely because it is more substantial than simply disconnecting and reconnecting to Wi-Fi. It can remove problematic adapter configurations and reinstall the networking components, giving Windows a cleaner starting point. But that same breadth is why it should not be the first button you press whenever an internet connection misbehaves.
Before using it, establish that the problem is probably on the Windows computer rather than the router, ISP, Wi-Fi environment, or individual service. Try the simpler recovery steps, consider what networking software you rely on, and make sure you have the information needed to reconnect afterward.
If you eventually perform the reset and the problem disappears, you have a useful clue about the old configuration. If nothing changes, resist the urge to keep resetting. At that point, the better question is no longer “How do I reset Windows networking again?” but “Which part of the connection is actually failing?” That shift from repeatedly resetting settings to identifying the real cause is what makes Windows network troubleshooting considerably more effective.