Category: Windows & Mac Settings

  • Boost Windows Speed with These Powerful Performance Settings

    Boost Windows Speed with These Powerful Performance Settings

    Windows PCs can become sluggish, making even simple tasks difficult. Opening a browser, switching between applications, or booting up the computer in the morning might take longer than usual. Many people assume they need a new laptop or an expensive hardware upgrade, but that isn’t always the case. Windows includes various built-in settings that can reduce background activity and optimize resource usage, which can improve performance. These adjustments require no technical expertise, and most settings can be reverted if you aren’t satisfied with the results.Computers accumulate startup applications, temporary files, background processes, and visual effects—all of which can negatively impact performance. When Windows performs unnecessary tasks, even a computer that usually runs smoothly can feel sluggish. This article introduces the best Windows performance settings for beginners. You will learn how to adjust your computer settings and understand why they work, rather than resorting to risky shortcuts or third-party optimization tools.

    Understand why Windows Slows Down

    Windows performance often declines gradually. After months or years of use, a slow computer typically exhibits a few minor issues. One reason is the increasing number of programs that run automatically when Windows starts up. Installing software often leads to numerous applications launching at startup; while some are useful, others run in the background even when rarely used.

    Another factor is limited system capacity. Your computer relies on memory, processing power, and storage speed. Windows can slow down when too many programs compete for these resources. Visual effects can also affect performance, particularly on older computers. While animations, transparency, and shadows can make Windows look smoother, they consume more graphics and processing power. Understanding these reasons helps optimize performance. Instead of changing settings at random, it is better to focus on the computer settings that truly matter.

    Startup App Management Reduces Boot Time

    Startup programs run when you turn on your computer. While security software and hardware utilities are essential, you do not need many programs immediately after startup.

    Instant messaging apps, cloud storage programs, or game launchers often start up alongside Windows. Even after you close their windows, these programs can still use memory and processing power. Task Manager makes it easy to view these applications in Windows. Disable applications that do not need to start automatically, while keeping them available for manual use.

    How to review startup programs

    1. Right-click the Start button and open Task Manager.
    2. Select the Startup apps section.
    3. Review the list of programs and assess their startup impact.
    4. Disable applications that you do not need when Windows begins.

    Be careful when disabling startup items. Avoid turning off programs you do not recognize until you understand their purpose. Some system utilities and security applications may be important for proper operation. A cleaner startup process often makes the computer feel faster because Windows has fewer tasks competing for resources immediately after login.

    Adjust Windows Visual Effects for Better Performance

    Windows uses animations and visual enhancements to create a smoother appearance. These effects are designed to improve the user experience, but they can consume resources, particularly on older computers or systems with limited graphics capability. Reducing unnecessary visual effects can make menus, windows, and applications feel more responsive. The difference may be small on newer computers but noticeable on devices that already struggle with speed.

    Changing visual performance settings

    1. Open the Windows search box and type “Adjust the appearance and performance of Windows.”
    2. Select the matching system settings option.
    3. Choose settings based on your preference, such as reducing animations or selecting performance-focused options.
    4. Apply the changes and test your system.

    You do not have to remove every visual effect. Many users prefer keeping some features, such as smoother font edges, while disabling effects that provide little practical benefit.

    Choose the Right Power Settings for Better Performance

    Windows uses power plans to control how your computer balances performance and energy usage. On laptops, the default settings are often designed to save battery life, which means your system may reduce performance when it is not connected to power. If you use your computer for demanding tasks such as editing videos, running professional software, playing games, or managing multiple applications, adjusting the power mode can make a noticeable difference.

    Windows 11 and newer versions provide simple power options that allow users to prioritize performance when needed. Desktop computers usually have fewer battery concerns, so performance-focused settings can be more practical.

    How to change Windows power mode

    1. Open Settings from the Start menu.
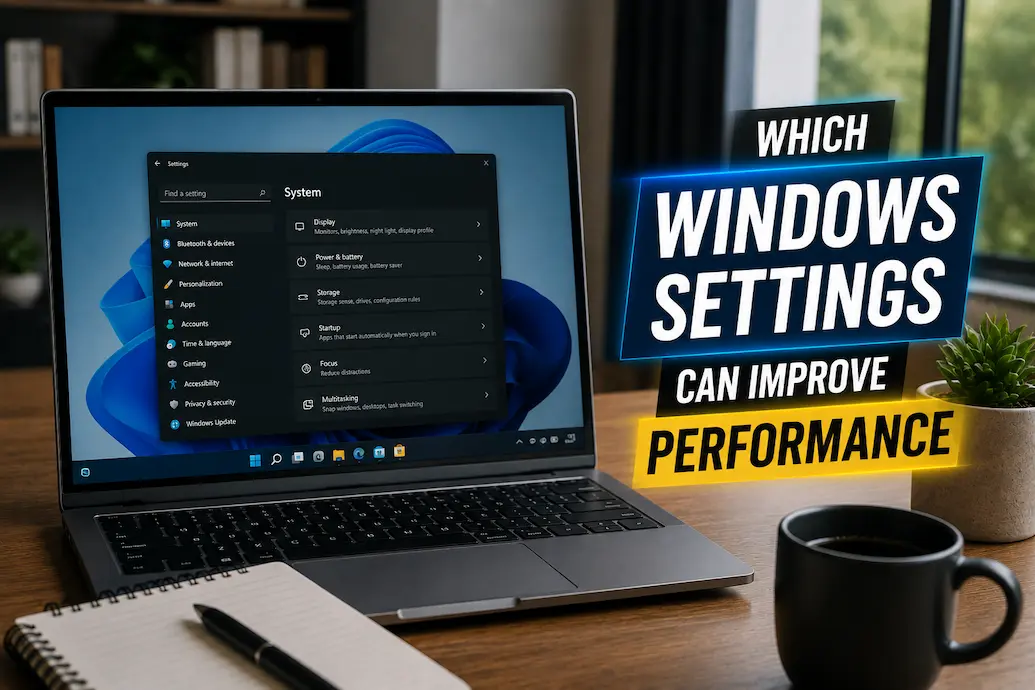
    2. Select System, then open Power & battery.
    3. Select the power mode option.
    4. Select a setting that gives more priority to performance when required.

    Keep in mind that higher performance settings may use more electricity and reduce laptop battery life. For everyday browsing or document work, a balanced mode is usually enough.

    Free Up Storage Space to Help Windows Run Smoothly

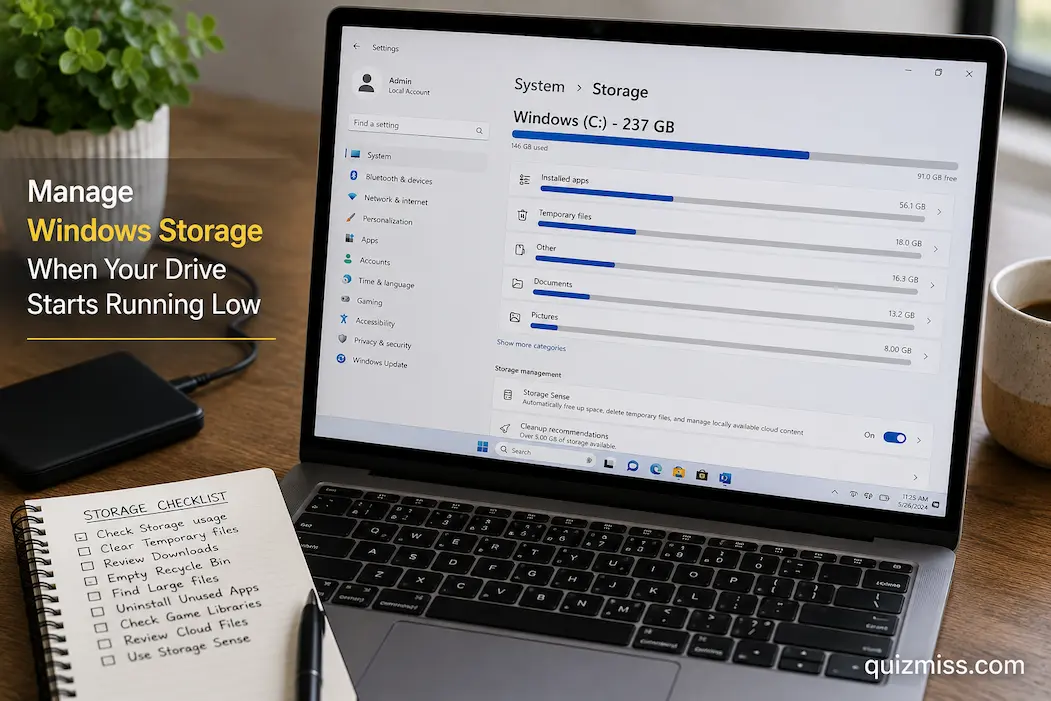
    A full storage drive can affect Windows performance. When your main drive has very little free space, the operating system has less room to manage temporary files, updates, and background operations. Many users save years of downloads, old installation files, temporary data, and unused applications without realizing how much space they consume. Removing unnecessary files can improve system management and make maintenance easier.

    Windows includes built-in cleanup tools that help identify files you no longer need. These tools are safer than randomly deleting folders because they understand which files are temporary and which ones are important.

    Useful storage cleanup options

    • Storage Sense: Automatically removes temporary files and manages storage space.
    • Temporary file cleanup: Removes unnecessary cached data and old system files.
    • Unused application removal: Deletes programs you no longer use.

    Before removing anything, please check the file category carefully. Personal documents, photos, and important downloads should always be reviewed manually before deletion.

    Keep Windows and Device Drivers Updated

    Updates are not only about adding new features. They often include performance improvements, security fixes, and compatibility updates that help Windows work better with your hardware. Outdated drivers can create problems between Windows and components such as graphics cards, network adapters, printers, and storage devices. A computer may become unstable or slower when hardware is not communicating correctly with the operating system.

    Windows Update can automatically handle many important updates, but it is still useful to check occasionally, especially if you notice problems after installing new hardware or software.

    Simple update routine

    1. Open Settings.
    2. Select Windows Update.
    3. Select Windows Update, then check for available updates.
    4. Restart your computer if required.

    Avoid downloading random driver update programs from unknown websites. Many of these tools are unnecessary and may install unwanted software. Official manufacturer sources and Windows Update are generally safer choices.

    Control Background Apps and Processes

    Some applications keep running in the background even when you are not using them. They may check for updates, sync files, send notifications, or collect information needed for their features. Background activity is not always a problem. For example, cloud storage synchronization can be useful when you need your files available across devices. The goal is not to stop everything but to reduce unnecessary activity.

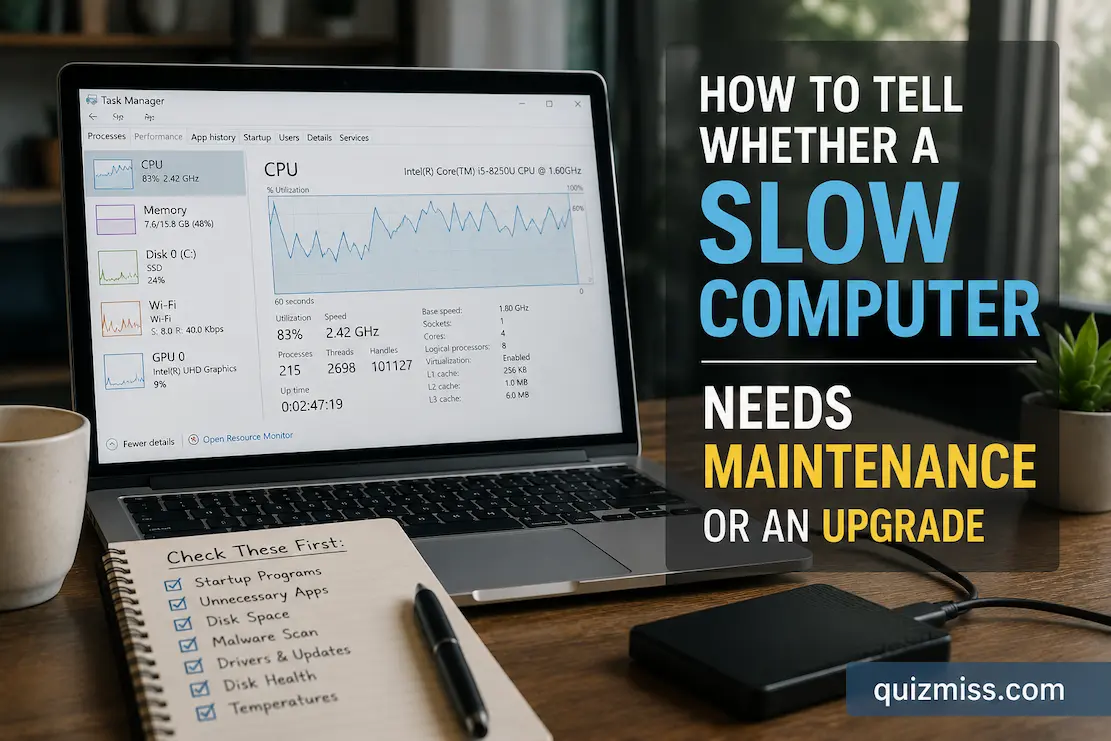
    Task Manager provides a brief look at which programs are consuming CPU, memory, disk, or network resources. This helps you find applications that may be slowing down your computer.

    Checking resource usage

    1. Press Ctrl + Shift + Esc to open Task Manager.
    2. Review the Processes tab.
    3. Sort applications by CPU or memory usage.
    4. Close any unnecessary programs that are consuming significant resources.

    Do not end unfamiliar system processes without checking their purpose first. Some background services are required for Windows to function properly.

    Optimize Browser Performance for Faster Everyday Use

    Many individuals use the browser most. Even with Windows working regularly, a slow browser can slow the PC. Many extensions, old browser versions, and cached data might slow browsing. Additional processes may require memory in the background with each extension. Check your browser extensions and remove unnecessary ones. Fewer add-ons usually improve browsing speed and cleanliness.

    • Simple browser upkeep
    • Remove unnecessary extensions.
    • Maintain browser updates.
    • Periodically delete superfluous stored data.
    • Avoid opening dozens of useless tabs.

    Reduced tabs can make more difference than many complicated system modifications on a PC with limited memory.

    Maintain Windows using Built-In Tools

    Windows has various options to preserve performance without optimization software. Regular maintenance prevents little faults from becoming performance difficulties. The built-in security and maintenance system analyzes system health, storage, and reliability. Periodically checking these areas can help you spot issues before they escalate.

    Disk optimization is also useful. Traditional hard drives and solid-state drives manage storage differently in modern Windows. SSD users rarely need manual disk defragmentation because Windows automatically optimizes.

    Good maintenance habits

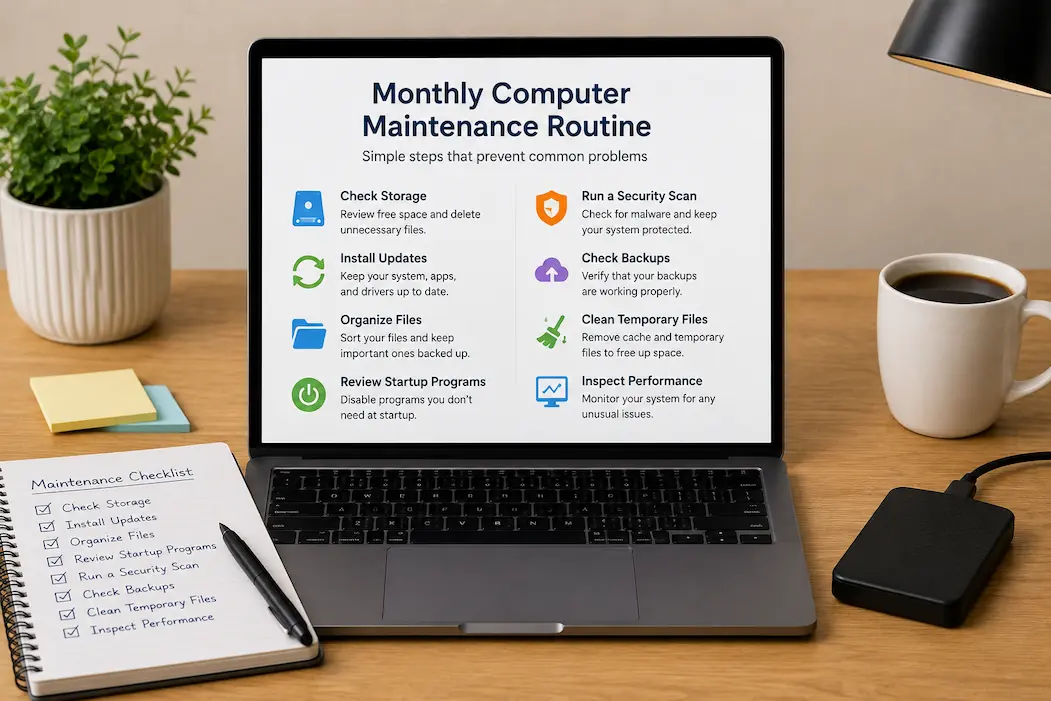
    • Restart your computer regularly instead of leaving it running for weeks.
    • Remove applications you no longer use.
    • Keep enough free storage space available.
    • Install Windows updates when they are available.
    • Run security checks if you notice unusual activity.

    Small maintenance steps performed consistently are usually more effective than trying extreme optimization methods after your computer becomes very slow.

    Common Mistakes

    Many people use aggressive online optimization advice to speed up their machine. These solutions may cause more issues than they solve. Using several system cleaners is a mistake. These apps often use the resources they claim to conserve in the background. Windows has numerous handy maintenance features.Another mistake is stopping arbitrary Windows services without knowing why. While not every user needs particular services, shutting off critical components can cause issues. Users should also be careful with registry cleansing. The Windows registry is delicate, and needless changes might cause stability issues.

    Conclusion

    Not all Windows speed improvements require pricey upgrades or difficult technical adjustments. Many performance issues stem from regular settings that subtly affect computer resource utilization. Managing starting apps, limiting visual effects, organizing storage, and maintaining Windows can improve many users’ experiences. The ideal way is to make deliberate adjustments, evaluate the effects, and avoid uninformed alterations. Most well-maintained computers stay speedier, more stable, and easier to use.

  • Master Windows Display Settings for a Better Viewing Experience

    Master Windows Display Settings for a Better Viewing Experience

    You sit at your computer, open a document, view a video, or browse the web, but something feels off. The text appears blurry, the colors are drab, the icons are too small, or your eyes are weary after using the screen. People commonly blame the monitor; however, the real issue is generally Windows display settings. Windows has several capabilities to control screen content. These options affect image sharpness, text size, color quality, and animation smoothness. These simple tweaks can make your computer more pleasant to use, especially if you spend long hours at the screen.

    Technical knowledge is not needed to understand display settings. To improve your viewing experience, you don’t need new hardware or technical skills. You can optimize your screen for your eyes, tasks, and preferences by learning what each setting does and when to change it. These basic instructions cover Windows’ most critical display settings, including resolution, scaling, refresh rate, brightness, night light, color options, and frequent display issues.

    Discovering Windows Display Settings and Basics

    Know where Windows’ display controls are to improve your screen experience. Microsoft arranged most screen-related choices in the Settings program, making them easier to discover than in prior Windows editions. Right-click an empty desktop space and select Display settings. Options include Settings, System, and Display.

    Several portions of the display page regulate screen elements. Others impact how smoothly your computer shows movement, while others affect appearance.

    Setting What It Controls When You May Need to Change It
    Display Resolution The sharpness and amount of content shown on your screen When text looks blurry or everything appears too large or small
    Scale The size of text, apps, and icons When items are difficult to read on high-resolution screens
    Refresh Rate How many times the screen updates each second When scrolling or motion feels less smooth
    Brightness The intensity of screen lighting When the screen feels too bright, dark, or uncomfortable

    A common mistake is changing several settings at once without understanding what each one does. If something looks worse afterward, it becomes harder to identify which adjustment caused the problem. Make one change at a time and check the result before moving to another setting.

    Choosing the Right Display Resolution for Clearer Images

    Resolution is one of the most important display settings because it determines how many pixels Windows uses to create images and text. A higher resolution usually means more detail and sharper visuals, but it also makes everything appear smaller because more information fits on the screen.

    For example, a modern 4K monitor has many more pixels than a traditional Full HD display. This allows images and videos to look extremely detailed, but small text may become difficult to read if Windows scaling is not adjusted correctly. Windows usually detects your monitor’s recommended resolution automatically. In most cases, the recommended option is the best choice because it matches the screen’s physical design.

    How to Check or Change Resolution

    1. Open Settings.
    2. Select System and choose Display.
    3. Select display resolution.
    4. Select the option marked as recommended.

    If you select a resolution that does not match your monitor, the image may appear stretched, blurry, or surrounded by unused space. This happens because Windows is trying to fit a different number of pixels into a screen designed for another resolution. Another common issue occurs when people lower the resolution to make the text larger. While this approach may solve the size problem temporarily, it can reduce image quality. A better solution is usually adjusting the scaling setting instead.

    Understanding Display Scaling and Making Text Easier to Read

    Display scaling controls the size of text, buttons, icons, and other interface elements without reducing the screen’s sharpness. This setting is especially useful on laptops and high-resolution monitors where everything can look unusually small. For example, a laptop with a small 13-inch screen and a high-resolution display may technically show very sharp images, but menus and text can become uncomfortable to read at the default size. Increasing scaling allows Windows to enlarge these elements while keeping the image quality intact.

    Common scaling options include percentages such as 100%, 125%, and 150%. The best choice depends on your screen size, resolution, and viewing distance.

    Finding the Best Scaling Level

    There is no single perfect scaling percentage for everyone. Someone working on a large monitor from a distance may prefer a different setting than someone using a laptop close to their eyes.

    • 100% scaling: Usually works well on standard-sized monitors with moderate resolutions.
    • 125% scaling: Often improves readability on many modern laptops.
    • 150% or higher: Can help on very high-resolution screens where text appears too small.

    After changing scaling, some applications may need to be restarted before they display correctly. Older programs that were not designed for modern high-resolution screens can sometimes appear blurry until Windows applies compatibility adjustments.

    Adjusting Refresh Rate for Smoother Screen Movement

    The refresh rate controls how often your display updates its image every second. This is measured in Hz. Moving windows, reading webpages, watching videos, and playing games look smoother with a higher refresh rate. Standard 60Hz monitors are ideal for surfing, business tasks, and movies. Some contemporary screens support 90 Hz, 120 Hz, or greater refresh rates. Selecting the right refresh rate helps improve computer responsiveness. A common mistake is buying a high-refresh-rate monitor and setting Windows to a lower value. The display may perform better, but Windows won’t use it unless the setting is adjusted.

    How to Change Refresh Rate in Windows

    1. Open Settings and go to System.
    2. Select Display.
    3. Choose Advanced display.
    4. Select the available refresh rate from the menu.

    If you notice screen flickering, black screens, or instability after changing the refresh rate, return to the previous setting. Not every monitor, cable, or graphics card combination supports every available refresh rate. For the best results, use a proper display cable and make sure your graphics drivers are updated. Sometimes a hardware connection problem can look like a Windows setting issue.

    Managing Brightness and Protecting Your Eyes

    Brightness is one of the simplest display settings to adjust, but it has a major effect on comfort. A screen that is too bright in a dark room can cause discomfort, while a screen that is too dim in a bright environment may force you to strain your eyes. The ideal brightness level depends on your surroundings. A display used near a sunny window usually needs more brightness than a screen used in a softly lit room. Laptop users can usually adjust brightness using the keyboard function keys or the brightness slider in Windows display settings. Desktop monitor users may need to use buttons or controls built into the monitor itself.

    Simple Brightness Tips

    • Match screen brightness with the lighting in your room.
    • Avoid using maximum brightness for long periods unless necessary.
    • Reduce brightness when working in a darker environment.
    • Clean your screen regularly because dust and fingerprints can make images appear less clear.

    Many people increase brightness when text looks unclear, but such an action does not fix blurry text. If content looks difficult to read, check resolution, scaling, and font settings before increasing brightness.

    Using Night Light and Color Settings for Comfortable Viewing

    Windows includes a feature called Night Light, which changes the color temperature of your display by reducing blue light during selected hours. Many users find warmer screen colors more comfortable, especially when using a computer in the evening. Night Light does not improve image quality or repair display problems. Its purpose is comfort. When enabled, the screen may appear slightly warmer or more yellow because Windows adjusts the balance of colors.

    How to Enable Night Light

    1. Open Settings.
    2. Select System and choose Display.
    3. Turn on night light.
    4. Adjust the strength level based on your preference.

    You can schedule Night Light to turn on automatically at specific times or follow your location-based sunset and sunrise schedules. This makes it easier to maintain a consistent viewing routine. Keep in mind that color changes from Night Light may not be suitable for tasks where accurate colors matter, such as photo editing, graphic design, or professional video work. In those situations, you may want to disable it while working.

    Improving Text Quality with ClearType Settings

    If letters on your screen appear fuzzy or uncomfortable to read, Windows has a built-in tool called ClearType. It adjusts how fonts are displayed so text appears sharper and easier to read on many monitors. ClearType is especially useful for people who spend long hours reading documents, writing emails, or working with spreadsheets. Small improvements in text clarity can make daily computer use much more comfortable.

    Running the ClearType Text Tuner

    1. Open the Windows search box.
    2. Type ClearType.
    3. Select Adjust ClearType text.
    4. Follow the steps and choose the text examples that look clearest.

    The process is based on your personal vision and the characteristics of the monitor. Two people using the same screen may choose slightly different options because visual comfort varies from person to person. If text remains blurry after adjusting ClearType, check whether your monitor is running at its recommended resolution. ClearType cannot fully correct an incorrect resolution setting.

    Troubleshooting Common Windows Display Problems

    Display problems can happen for many reasons, including incorrect settings, outdated drivers, cable issues, or hardware limitations. Before assuming that your monitor is damaged, try some basic troubleshooting steps.

    Screen Looks Blurry

    Using a non-recommended resolution often causes blurry images or text. Return to the recommended resolution in Windows display settings and check whether the problem improves. If only certain applications look blurry, Windows compatibility settings may help. Some older programs were created before high-resolution displays became common and may not scale correctly.

    Display Is Too Small or Too Large

    If icons and text are difficult to see, adjust scaling instead of lowering resolution. Changing resolution can reduce sharpness, while scaling keeps the original image quality and only changes the size of interface elements.

    Screen Flickers or Goes Black

    Flickering may be related to refresh rate settings, graphics drivers, loose cables, or monitor problems. Try reconnecting the display cable, selecting a different refresh rate, and updating your graphics driver.

    Colors Look Wrong

    Incorrect colors can result from display profiles, Night Light, graphics settings, or monitor adjustments. Turn off color-changing features temporarily and check whether the display returns to normal.

    Best Practices for Maintaining a Good Display Experience

    Setting up a pleasant display is not something you do once and forget. Work, surroundings, and computer gadgets might affect your demands. For instance, spreadsheet users may prefer a larger font and acceptable brightness, while photo editors may value precise colors. The ideal settings depend on your computer usage.

    • Windows and graphics drivers should be updated.
    • Use the monitor’s recommended resolution wherever possible.
    • Adjust brightness for room lighting.
    • For clarity, clean your screen using appropriate materials.
    • Review display settings after adding a monitor or projector.

    Minor changes often make the largest difference. No expensive equipment is needed to make your computer more user-friendly.

    FAQs

    1. Windows’ greatest display resolution?

    Windows display settings indicate the best resolution because it matches your monitor’s native resolution. The native resolution usually produces the sharpest images. If text is too small, scale it instead of lowering resolution.

    2. Why is my Windows screen blurry?

    A fuzzy Windows display can result from an inappropriate resolution, scaling settings, obsolete graphics drivers, or an application that doesn’t support high-resolution screens. Verify your display resolution for the suggested setting.

    3. Should I increase my display refresh rate?

    A greater refresh rate can smooth movement on your monitor. It is most noticeable when scrolling, gaming, or moving windows. Email and document editing work well at 60Hz.

    4. Windows Night Light: An Eye Health Benefit?

    Windows Night Light adjusts screen color temperature for better nighttime viewing. It may help certain people, but it doesn’t substitute healthy screen habits like taking breaks, adjusting brightness, and utilizing suitable lighting.

    5. My monitor colors changed after adjusting display settings. Why?

    Adjusting night light, color profiles, or graphical choices can change color. Review these settings and use your monitor’s recommended color mode for accurate colors in your work.

    6. Can altering Windows display settings harm my monitor?

    Resolution, scaling, and refresh rate modifications in Windows are safe. However, unsupported settings may produce flickering or blank screens. Revert to the previous work setting.

    Conclusion

    Windows display settings are commonly disregarded yet affect computer comfort and productivity. A screen that is unclear, bright, or difficult to read doesn’t always need new technology. Correct changes frequently fix the issue.

    Start simple: utilize the suggested resolution, a comfortable scaling level, brightness, and a monitor-supported refresh rate. Next, try Night Light and ClearType to customize your experience. Your needs determine the ideal display arrangement. Understanding these options can make computer use easier, more comfortable, and more enjoyable.

  • Fix Internet Problems by Resetting Network Settings Correctly

    Fix Internet Problems by Resetting Network Settings Correctly

    Your internet connection can go down at the worst time. Websites won’t load, video calls halt, apps show offline messages, or your device stops connecting to Wi-Fi after a few minutes. Many people blame the router or internet provider, although the issue is typically much closer to home. Network settings govern device communication with your router, Wi-Fi network, and internet. These settings can vary due to software upgrades, VPN apps, manual modifications, preserved network profiles, or broken connection information. Often, changing network settings restores connectivity.

    Network resets are different than restarting or disconnecting your router. It deletes network configurations and starts over. This makes it a valuable internet troubleshooting step when basic remedies fail. Understanding network resets, what they alter, and how to do them is crucial. A bad method might irritate, especially if you forget Wi-Fi passwords or use unique network setups. This instruction simplifies connection troubleshooting for safety.

    What a Network Reset Does

    A network reset resets your device’s network settings to default. It removes previous connection information and lets your device connect to your network again. Over time, devices save Wi-Fi networks, network adapters, DNS settings, VPN connections, and other communication preferences. A faulty or outdated setting can prohibit your device from connecting, although these settings usually function OK.

    Suppose your laptop connects to your house Wi-Fi but always says “No Internet Access.” Your router works, other devices are online, and restarting the laptop accomplishes nothing. A faulty network configuration may prevent the laptop from receiving the correct connection details. Resetting network settings lets the system rebuild from the broken setup.

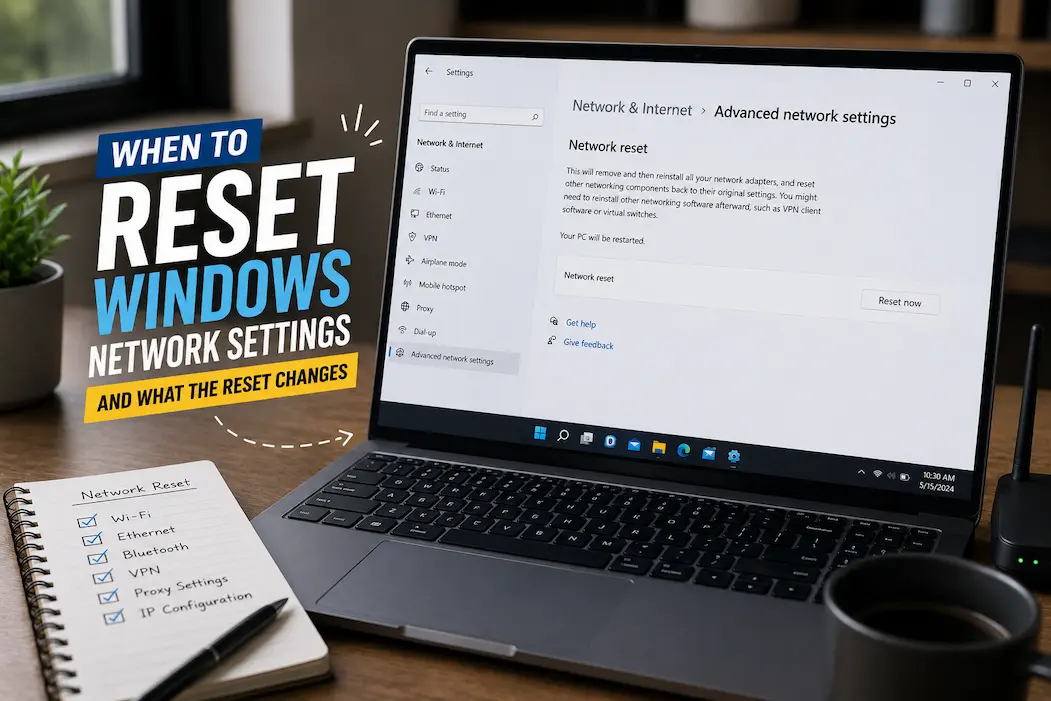
    Network resets change settings like:

    • Saved Wi-Fi passwords and networks
    • VPN setups
    • Some devices’ Bluetooth network connections
    • Network adapter settings
    • Configure DNS or proxy.

    When Resetting Network Settings Is the Right Solution

    A network reset should not be the first thing you try every time the internet stops working. Simple issues like a temporary router problem, weak Wi-Fi signal, or an unplugged cable can often be fixed faster. A reset becomes more useful when the problem appears to be connected to your device itself.

    Common situations where a network reset may help include:

    • Your device connects to Wi-Fi, but websites do not open.
    • Internet works on other devices but not on one specific device.
    • You recently installed a VPN, firewall tool, or network-related software.
    • Your device keeps disconnecting from Wi-Fi for no obvious reason.
    • Network settings were manually changed, and you are unsure what was modified.
    • A system update caused unexpected connection problems.

    For instance, if your phone connects normally to your home Wi-Fi but fails to connect after visiting another network, an old saved configuration may be interfering. Resetting network settings can remove those conflicting details. However, a reset will not fix every internet issue. If your internet provider has an outage, your router is damaged, or your signal is too weak, changing your device settings will not solve the underlying problem.

    Things to Check Before Resetting Network Settings

    Before performing a network reset, take a few minutes to check whether the problem has a simpler explanation. This can save time and prevent unnecessary setup work afterward. First, check whether other devices are connected to the same network. If your phone, tablet, and another computer are also offline, the problem may be with your router or internet service rather than your device.

    Next, restart your device and router. A temporary software glitch can sometimes disappear after a normal restart. If the issue returns repeatedly, a network reset becomes a more reasonable next step. It is also helpful to remember your Wi-Fi password before starting. After the reset, your device may forget previously saved wireless networks, and you will need to enter the password again.

    Before Resetting Why It Helps
    Check other devices Determines whether the problem is with your device or the entire network.
    Restart router and device Removes temporary connection errors.
    Save Wi-Fi password Allows you to reconnect quickly after the reset.
    Remember VPN or custom settings Helps restore special configurations if needed.

    How to Reset Network Settings on Different Devices

    The exact steps for resetting network settings depend on the operating system you use. Each platform stores connection information differently, but the purpose is the same: remove old network configurations and allow the device to create fresh connections. Before starting, make sure you understand that the reset process is different from simply turning Wi-Fi off and on. It changes stored network information, so you may need to reconnect to wireless networks afterward.

    Resetting Network Settings on Windows

    Windows includes a built-in network reset option that removes and reinstalls network adapters while returning network settings to their default state. This can help when Wi-Fi, Ethernet, or other connection features behave incorrectly. On Windows 11, you can usually find this option by opening Settings, selecting Network & Internet, choosing Advanced network settings, and selecting Network reset. Windows will explain what will be removed before you confirm the action.

    After completing the reset, Windows may restart your computer. Once it starts again, reconnect to your Wi-Fi network and test your internet connection. This process is especially useful when Windows shows errors such as “Unable to connect to this network,” frequent disconnections, or incorrect network identification.

    Resetting Network Settings on Android

    Android devices place network reset options inside the system settings, although the exact menu names vary between manufacturers. The option is usually located under settings related to system management, general management, or reset options. A network reset on Android commonly removes saved Wi-Fi networks, Bluetooth connections, and mobile network settings. It does not remove apps, photos, or personal files. If your Android phone connects to Wi-Fi but apps cannot access the internet, or mobile data settings appear incorrect after switching carriers, resetting network settings can help rebuild the connection.

    Resetting Network Settings on iPhone

    iPhone users can reset network settings through the device settings menu. This option restores network-related configurations while keeping personal content intact. After the reset, your iPhone will forget saved Wi-Fi networks, so you will need to reconnect manually. Any VPN or custom network settings may also need to be configured again. This is a common troubleshooting step when an iPhone has problems connecting to Wi-Fi, Bluetooth accessories, or mobile networks after a software change.

    What to Do After Resetting Network Settings

    A network reset is not the final step. Your device needs to rebuild its connection with your network. Taking a few minutes afterward can help you confirm whether the problem has actually been solved. Start by reconnecting to your Wi-Fi network. Select your network name, enter the password, and wait for the device to establish a connection. If you use multiple networks, such as home Wi-Fi, office Wi-Fi, or a mobile hotspot, you may need to reconnect to each one separately.

    Next, open a few websites or apps to test the connection. Do not rely only on the Wi-Fi symbol because a device can show a connection while still having trouble reaching the internet. If you previously used a VPN, proxy server, custom DNS service, or workplace network settings, check whether you need to restore them. Some users forget that they configured these settings and assume the reset caused a new problem.

    • Reconnect to important Wi-Fi networks.
    • Test browsing, streaming, and other online services.
    • Restore VPN or custom network settings if required.
    • Update network drivers or system software if problems continue.

    Common Mistakes People Make When Resetting Network Settings

    Resetting network settings is generally safe, but mistakes before or after the process can make troubleshooting more confusing. Understanding these common problems helps you avoid unnecessary frustration.

    Resetting Without Knowing the Wi-Fi Password

    One of the most common mistakes is starting the reset without having access to the Wi-Fi password. Since saved wireless networks are usually removed, you may find yourself unable to reconnect afterward. If you do not remember your password, check whether it is saved on another connected device or available through your router settings before performing the reset.

    Assuming a Reset Fixes Router Problems

    A network reset only changes settings on your device. It cannot repair a damaged router, a broken cable, or an internet outage from your provider. If every device in your home loses internet access at the same time, resetting your laptop or phone will probably not help. In that situation, checking the router or contacting your internet provider is a better approach.

    Forgetting Special Network Configurations

    Some users rely on custom settings without realizing it. Businesses, schools, and advanced home users may use VPN connections, manually assigned IP addresses, or specific DNS settings. A reset removes these configurations, so make a note of anything unusual before proceeding.

    Prevent Future Network Problems

    You can fix Internet troubles, but preventing them saves time. Good network habits can help you avoid connection failures. Update your OS and network drivers. Outdated software that doesn’t work with updated routers or security standards causes many connection issues.

    Install only the network management tools you need. When configured poorly, VPN, optimization, and firewall software can disrupt network connections. Securing your Wi-Fi password and router details is also helpful. This simplifies resets and device replacements. Updating devices, placing the router appropriately, securing settings, and restarting when difficulties arise usually maintain a reliable network.

    FAQs

    Are my photographs, apps, and personal items deleted when I reset network settings?

    No. A network reset just resets connection settings. Photos, videos, documents, apps, and accounts are unaffected. Saved Wi-Fi, Bluetooth, VPN, and other network setups are the primary improvements.

    Should I reset my network settings often?

    Network settings should not be reset periodically for maintenance. This is a troubleshooting step for recurring connectivity issues that simpler remedies fail. Resets might be inconvenient because you must reconnect networks and restore specific settings.

    Why is my internet still down after a network reset?

    Device settings errors or damage are the only issues a network reset fixes. This reset will not fix issues caused by your router, internet provider, faulty hardware, weak signal, or service outage. In that scenario, find the connection issue.

    Must I reset network settings after changing my Wi-Fi router?

    Not always. Most devices may connect to a new router by selecting the Wi-Fi network and inputting the password. Resetting network settings can remove obsolete connection information if your device keeps using old settings or won’t connect.

    Does resetting network settings differ from a router restart?

    Yes. Your internet connection is refreshed when you restart your router. Device configuration changes when network settings are reset. One impacts the router; the other, your computer, phone, or tablet.

    Conclusion

    Internet issues are frustrating since their causes are often unclear. A device may appear connected but not communicate due to hidden network settings. A practical solution to fix hidden setup issues and restart your device is to reset network settings.

    Resetting at the right time is crucial. Before starting, check simple causes, remember your Wi-Fi password, and know what settings will be erased. This simple precaution can prevent future issues. Network resets are one of the best internet troubleshooting techniques when utilized properly. Although it does not cure router faults or service outages, it can swiftly fix many device settings-related connectivity issues.

    Reliable References and Further Reading

    The following resources provide official guidance about managing network settings and troubleshooting connection problems:

    • Microsoft Support documentation on fixing network connection problems and using Windows network reset tools.
    • Apple Support provides guidance for resetting network settings on iPhone and iPad devices.
    • Android Help documentation for managing network settings and troubleshooting connectivity issues.
    • Federal Communications Commission (FCC) consumer resources about internet connectivity and broadband troubleshooting.
  • Manage User Accounts Like a Pro on Windows and Mac

    Manage User Accounts Like a Pro on Windows and Mac

    Imagine using the same login account on your home computer. Your photos would mix with everyone else’s, browser suggestions would be chaotic, and changing a single setting would affect everyone. In the workplace, sharing accounts or keeping old accounts active after a device is no longer in use can lead to similar issues. User accounts are a simple way to manage and protect your computer. Windows and Mac systems allow you to create private spaces, manage file rights, control permissions, and protect sensitive data. Many users create accounts during the initial computer setup but never really explore these options further.

    Effectively managing user accounts helps prevent forgotten passwords, unauthorized access, confusion over file ownership, and security risks. Effective account management does not require advanced technical knowledge. Mastering a few basic principles makes your computer more user-friendly and secure. This guide covers Windows and Mac user accounts, how to create and delete accounts, administrator rights, and account maintenance.

    Understanding User Accounts (before making changes)

    A computer user account is a personal identifier. It tells the operating system who is using the device and what actions they are permitted to perform. Accounts can have their own desktop, files, and settings without sharing them with others. Logging in loads your desktop layout, saved settings, program preferences, and file permissions. This isolation mechanism prevents users from interfering with one another, whether at home, school, or work.

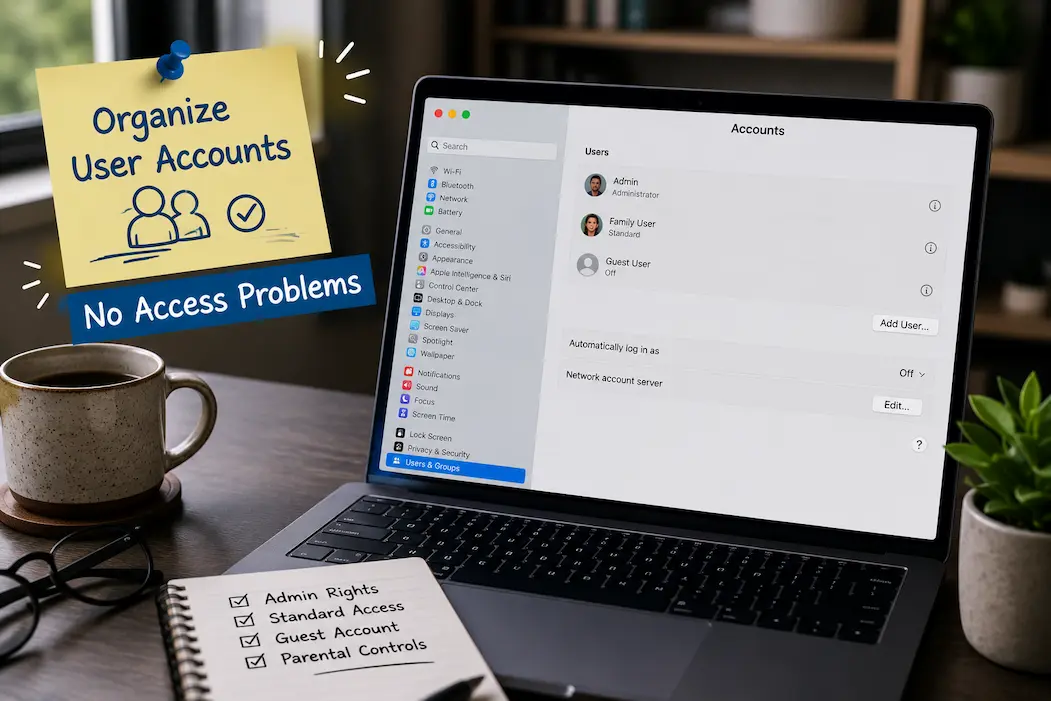
    Both Windows and Mac accounts rely on permissions. A user’s actions depend on their specific permissions. For example, one account can install software and change system settings, while another account can only use applications and access personal files. New users need to understand the difference between standard accounts and administrator accounts.

    Account Type What It Can Do Best Used For
    Standard User Use applications, manage personal files, and adjust personal settings without making major system changes. Daily use includes children, guests, and regular employees.
    Administrator Install software, change system settings, create accounts, and manage device-level changes. Device owners or trusted technical users.

    Many home users make the mistake of giving every person administrator access because it seems easier. While convenient, such actions can create unnecessary risks. A standard account is often enough for everyday activities such as browsing the internet, writing documents, watching videos, and using installed applications.

    Managing User Accounts on Windows

    Windows provides several ways to manage accounts depending on the version you use. In modern versions such as Windows 10 and Windows 11, most account settings are available through the Settings app. Microsoft also supports different account types, including local accounts and Microsoft accounts.

    Microsoft Accounts and Local Accounts

    A Microsoft account connects your Windows profile with Microsoft’s online services. It can synchronize certain settings, provide access to services such as cloud storage, and make it easier to use the same account across multiple Windows devices. A local account exists only on the computer. It does not require an online connection and stores settings directly on that device. Some users prefer local accounts because they want a simpler setup or do not want their computer login connected to an online service. Choosing between these account types depends on how you use your computer. Someone who owns multiple Windows devices may find an online account convenient, while someone using a single personal computer may prefer a local account.

    Creating a New User Account in Windows

    To create a new account on Windows, open Settings, go to Accounts, and look for options related to family members or other users. Windows guides you through adding a new account and choosing the appropriate permissions. A common example is setting up a separate account for a family member. Instead of sharing your personal login, the new user receives their desktop, files, and preferences. This keeps personal information private while allowing everyone to use the same computer. When creating accounts, avoid using simple passwords or leaving accothem unprotecteden a computer used only at home can contain private documents, saved browser passwords, financial information, and personal photos.

    Changing Account Permissions in Windows

    You can change account permissions when a user’s role changes. For example, a child who becomes older may need fewer restrictions, or an employee may need additional access for work tasks. Before changing a standard user into an administrator, consider whether that level of access is actually necessary. Administrator privileges should be given carefully because they allow changes that can affect the entire system.

    Managing User Accounts on Mac

    Apple designs macOS user accounts around simplicity and security. Like Windows, Mac allows multiple people to have separate accounts on the same device, each with their own files, settings, applications, and preferences. This separation is especially useful for households where several people share one Mac. Instead of switching between different browser profiles or manually organizing folders, each person can sign in to their own account and have a personal workspace.

    macOS uses account permissions to control what users can do. The main account categories are administrator accounts and standard accounts. An administrator can make system-level changes, while a standard user can perform everyday tasks without having full control over the computer.

    Creating a New Account on Mac

    To add a new user, open System Settings and navigate to the users or account management section. From there, macOS allows you to add another person and choose the type of account they should have. For example, if a family shares a MacBook, parents can keep administrator access while creating standard accounts for other family members. Each person gets their documents, desktop layout, and application preferences without affecting others. When creating a new account, use a strong password and avoid creating unnecessary administrator accounts. A computer with many administrator users has more opportunities for accidental system changes.

    Understanding Guest Accounts on Mac

    macOS also includes a guest account option designed for temporary access. A guest user can use the computer without accessing the main user’s personal files. Guest accounts are useful when someone needs to quickly check email, browse the internet, or complete a short task. They are safer than sharing your personal login because your saved passwords, documents, and settings remain separate. If you rarely allow others to use your Mac, you can disable guest access to reduce the number of available login options.

    How to Remove Old User Accounts Safely

    Over time, computers often collect unused accounts. You may have an account from a previous family member, an old work profile, or a temporary account created for troubleshooting. Keeping unnecessary accounts can make your computer harder to manage and may create privacy concerns.

    Before deleting an account, check whether it contains important files. Many users remove an old account without realizing that they have stored documents, photos, or downloads in that profile. A safer approach is to review the account first, copy important files to another location, and then remove the account if it is no longer needed.

    Before Removing an Account Why It Matters
    Check personal folders Important files may exist only inside that user’s profile.
    Confirm the account is unused Deleting an active account can interrupt someone’s work.
    Create a backup if needed Backups prevent accidental data loss.

    Windows and macOS both provide options to remove accounts while keeping or deleting associated data. The correct choice depends on whether the files need to be saved or permanently removed.

    Password Management and Account Security

    A user account is only as secure as the protection behind it. A strong password is one of the simplest ways to prevent unauthorized access, especially on laptops that someone might lose or steal. Avoid passwords based on easily guessed information such as names, birthdays, or common words. A longer password made from a combination of words, numbers, and symbols is generally harder to guess. Many modern computers also support additional security features such as fingerprint login, facial recognition, or security keys. These features can make signing in faster while adding another layer of protection.

    Good Account Security Habits

    • Use a separate account for each person who regularly uses the computer.
    • Keep administrator access limited to trusted users.
    • Enable automatic updates for the operating system.
    • Remove accounts that are no longer needed.
    • Lock your computer when leaving it unattended.

    One common mistake is saving sensitive information inside an account that many people can access. Even trusted family members may accidentally open files, change settings, or install unwanted software when everyone uses the same profile.

    Common User Account Problems and Simple Fixes

    Account problems can happen on any computer. The solution is often simple once you understand how accounts and permissions work.

    Forgotten Password

    If you forget your account password, the recovery process depends on whether you use a Microsoft account, Apple account, or local account. Using recovery options during account setup makes future access much easier. Avoid creating multiple new accounts just because you cannot access an old one. Such actions can create confusion and may leave important files behind.

    Cannot Install Software

    A standard account may not have permission to install certain applications or make system changes. This is normal and does not mean the computer is damaged. If you trust the software and need to install it, an administrator account may be required. After completing the task, continuing everyday work from a standard account is usually safer.

    Account Settings Are Not Syncing

    Users with Microsoft accounts or Apple accounts may expect settings to appear automatically across devices. If something does not sync correctly, check that you are signed in to the correct account and that you have internet access. Sync features can be useful but they should not replace regular backups. Account synchronization and file backup solve different problems.

    Keeping User Accounts Organized Over Time

    Creating user accounts is only the first step. Good account management requires occasional maintenance, just like organizing files or updating applications. Over the years, a computer can slowly collect unused profiles, outdated permissions, and forgotten settings. Every few months, check the accounts on your computer and see if you still need each one. Remove temporary accounts, update passwords, and check that you only give administrator access to people who actually require it.

    Account maintenance is especially useful for computers shared by families. Children may grow older and need different access levels, guests may no longer need accounts, or a family member may stop using the device completely. Keeping accounts organized also makes troubleshooting easier. When every person has a separate profile, it becomes much easier to identify whether a problem affects the entire computer or only one user’s settings.

    Best Practices for Managing Accounts Like a Pro

    Professional computer users do not usually rely on complicated tricks. They follow simple habits that keep devices secure, organized, and easier to maintain.

    • Create separate accounts: Every regular user should have their login instead of sharing one profile.
    • Use standard accounts for daily work: Administrator access should be reserved for tasks that actually need it.
    • Review permissions regularly: Remove unnecessary access when a person’s role changes.
    • Protect every account with a password: Even accounts that seem less important can contain private information.
    • Keep recovery options updated: Recovery emails, phone numbers, and account information can help when access problems occur.

    A well-managed computer is not necessarily one with the most security settings enabled. It is one where each person has the right amount of access without unnecessary complexity.

    FAQs

    1. Should the person using my computer have a separate account?

    In most cases, yes. A separate account offers better control over personal files, settings, browser data, and preferences. It also protects against accidental changes to files or settings.

    2. Is an administrator account more secure than a standard account?

    Administrator accounts offer more control but are not necessarily more secure. Because administrators can make extensive system changes, malware or accidental modifications can lead to significant issues. A standard account is more suitable for everyday tasks.

    3. Can I change a standard account into an administrator account later?

    Yes. Both Windows and macOS allow you to change account privileges. Granting administrator rights is useful, but it affects the entire computer, so proceed with caution.

    4. What happens to the files associated with a deleted user account?

    That depends on the deletion options chosen. Some systems allow you to save user files before deactivating the account, while others remove configuration files. Always check for important files before deactivating an account.

    5. Should I use a separate account if I am the only person using the computer?

    Not necessarily. A single account is sufficient for a computer used by only one person. However, for added security, users can create separate administrator and standard accounts.

    Conclusion

    User accounts are a fundamental feature of a computer and impact privacy, organization, and security. Creating the appropriate accounts and managing permissions can help prevent common issues on Windows or Mac systems.

    The simplest approach is to assign each person their own account, limit administrator privileges, secure accounts with strong passwords, and remove any unnecessary profiles. These simple steps ensure that your computer remains organized and easy to manage, even as your needs change. Understanding user accounts gives you greater control over your device. Account settings are neither complex nor difficult to understand; they can help you better organize and secure your computer.

    Reliable References

    The following official resources provide additional information about managing user accounts and security settings:

    • Microsoft Support documentation for managing accounts and permissions in Windows.
    • Apple Support documentation for adding and managing users on Mac computers.
    • National Institute of Standards and Technology (NIST) guidance on account security and authentication practices.
  • Hidden File Explorer Settings That Make Windows Easier to Use

    Hidden File Explorer Settings That Make Windows Easier to Use

    Most Windows users open File Explorer often without adjusting its settings. Users navigate directories, view documents, search for files, and move photos, yet they often overlook little elements that make these operations easier. File Explorer works well just after Windows installs, although the default arrangement is for general use. Not everyone organizes their files, protects their privacy, or works the same way. A few simple adjustments can speed up document searching, reduce clicks, and give you more screen control.These settings are concealed in menus that beginners rarely use. Windows has kept other functions around for years but hasn’t explained them. When troubleshooting, you can show file extensions, change folder views, improve search functionality, and disclose hidden files. You don’t need computer expertise to use these settings. You can make most changes in minutes, and you can undo them if you don’t like them. This post describes the best File Explorer settings for beginners and how they may organize and simplify Windows.

    Why File Explorer Settings Matter More Than Most Users Think

    File Explorer is your principal link to your computer’s files. Each downloaded photo, saved document, software folder, and personal project travels through it. An unconfigured file explorer causes tiny issues regularly. You may waste time searching the wrong folders, open the wrong file type, or wonder why two similar-named files act differently.

    File Explorer customization does not require complex system settings. It simply means customizing Windows to suit your needs. A frequent photo manager may prefer giant thumbnails over file lists. A person who downloads several documents may want file extensions to rapidly distinguish formats. Computer repair may require access to secret system directories. The best settings can help eliminate daily difficulties.

    Display File Extensions to Understand Files

    Enabling file extensions is a great File Explorer change for novices. Windows usually hides extensions for known file types, so a report may display instead of report. docx. Filename extensions are letters following the period. They identify file types for Windows and users. Image.jpg, document.pdf, video.mp4, and application.exe are common examples.

    Showing file extensions simplifies managing files. If you have numerous files with identical names, knowing the format helps you choose. Troubleshooting is easier because you can immediately tell if a file is a document, image, software, or something else.

    How to enable file extensions in Windows

    1. Open File Explorer.
    2. Select View from the top menu.
    3. Choose Show.
    4. Turn on file name extensions.

    After enabling this option, filenames will display their full format. This setting is especially helpful for people who download files frequently or work with different types of media.

    Tip: Seeing file extensions can help prevent mistakes because you can identify file types before opening them.

    Make File Explorer Open Where You Actually Need It

    When you open File Explorer, Windows usually starts with a default location such as Home or Quick Access. This works for many people, but it may not be the most convenient choice for everyone. If you regularly work inside a specific folder, such as Documents, Downloads, or a project folder, opening that location first can save time. Instead of clicking through multiple folders every time, you can start exactly where your work begins.

    Windows versions differ slightly in how this option appears, but you can usually adjust the starting location in File Explorer settings.

    Changing the default File Explorer starting location

    1. Open File Explorer.
    2. Select the three-dot menu or the View options depending on your Windows version.
    3. Open Options.
    4. Under the general settings area, choose your preferred opening location.
    5. Apply the changes.

    This small adjustment is useful because it removes repeated navigation. The less time you spend searching for the same folders, the more efficient your workflow becomes.

    Customize Quick Access for Faster File Management

    Quick Access is one of the most convenient parts of File Explorer, but many users leave it completely unchanged. It can become much more useful when customized properly. Quick Access allows you to pin folders that you open often. Instead of remembering the exact location of important files, you can place frequently used folders in an easy-to-reach area.

    For example, a student might pin a school project folder, while someone working from home might pin work documents and shared folders. The goal is not to pin everything but to create a small collection of locations you genuinely use.

    How to pin a folder to Quick Access

    1. Find the folder you use frequently.
    2. Right-click the folder.
    3. Select Pin to Quick Access.

    If Quick Access becomes crowded, please remove any folders you no longer need. A smaller, organized list is usually more useful than a long collection of old locations.

    Improve Folder Views So Files Are Easier to Find

    Many people use the same folder view for every type of file, even though different files are easier to manage in different layouts. Windows File Explorer allows you to change how folders display their contents, and choosing the right view can make everyday tasks much simpler.

    For example, a folder containing vacation photos is easier to browse with large thumbnails, while a folder full of invoices or reports may benefit from a detailed list showing names, dates, and file sizes. Changing folder views is not just about appearance. It changes how quickly you can understand what is inside a folder.

    Common File Explorer views and when to use them

    View Best Use Why It Helps
    Large icons Photos and visual files Makes it easier to identify images without opening each file.
    Details Documents and work files Shows information such as size, date modified, and file type.
    List Folders with many files Keeps the layout simple and compact.
    Tiles General browsing Provides a balance between file names and additional information.

    To change a folder view, open the folder, select View, and choose the layout that matches the type of content inside. A useful habit is to customize important folders individually instead of forcing every folder to look the same. Windows can remember different views for different types of folders.

    Display Hidden Files When You Need More Control

    Windows hides certain files and folders by default because some contain important system information. This protects beginners from accidentally changing files that could affect how Windows works.

    However, there are times when seeing hidden files becomes useful. Troubleshooting software problems, locating configuration files, or following technical instructions may require access to folders that are normally invisible. For example, some applications store settings inside hidden folders within your user profile. If you are trying to reset an application or remove leftover settings, these hidden locations may be involved.

    How to show hidden files in File Explorer

    1. Open File Explorer.
    2. Select View.
    3. Choose Show.
    4. Enable hidden items.

    Use this option carefully. Seeing hidden files does not mean they should be edited or deleted. Some folders are hidden because Windows expects them to remain unchanged.

    Use Search Filters to Find Files Faster

    Finding a file becomes difficult when your computer contains years of documents, downloads, pictures, and other saved information. Many users rely solely on typing a filename into the search box, but File Explorer offers more powerful search options.

    You can narrow results by file type, date, size, or location. These filters are especially useful when you remember details about a file but not its exact name. Imagine you downloaded a PDF guide several months ago but cannot remember the filename. Instead of opening hundreds of files, you can search within a folder and filter results to show only PDF documents.

    Examples of useful File Explorer searches

    • Type: Search for a specific file format, such as documents or images.
    • Date modified: Find files changed recently.
    • Size: Locate very large files taking up storage space.
    • Folder location: Search only where the file is likely stored.

    Better search habits reduce the need to create complicated folder systems. A well-organized computer is helpful, but good search skills are equally valuable.

    Remove Unnecessary Files From Quick Access History

    Quick Access is designed to help you return to frequently used locations, but it can also display recently opened files and folders. For personal computers, this feature may be convenient. On shared computers, this may expose information you would prefer to keep private. Clearing File Explorer history is a simple way to remove this recent activity information.

    How to clear File Explorer history

    1. Open File Explorer.
    2. Select the options menu.
    3. Open Folder Options.
    4. Under the privacy section, choose the option to clear File Explorer history.

    You can also adjust privacy-related Quick Access settings if you do not want Windows showing recently used files or frequently accessed folders. This setting is especially useful on family computers, office computers, or any device used by more than one person.

    Change Default File Associations to Avoid Opening Files Incorrectly

    Every file type in Windows is connected to a program that opens it. For example, image files may open in the Photos app, while PDF files may open in a web browser or another document reader.

    Occasionally Windows chooses a default application that is not the one you prefer. Changing file associations allows you to control which programs open specific file types. A common example is when someone installs a new media player but video files continue opening with the old application. Adjusting the default app solves this issue without requiring you to manually choose a program every time.

    How to change a default app for a file type

    1. Open Windows Settings.
    2. Select Apps.
    3. Choose default apps.
    4. Select the file type or application you want to change.

    Choosing the right default applications makes File Explorer feel more predictable because files open exactly how you expect.

    Enable Item Check Boxes for Easier File Selection

    Selecting multiple files in File Explorer is usually done by holding the Ctrl key while clicking different items. While this method works, it can become frustrating when you are managing many files or using a touchscreen device.

    Windows includes an option called “item check boxes” that adds small selection boxes beside files and folders. This gives you a more visual way to select multiple items without relying on keyboard shortcuts. This feature is especially useful when organizing photos, moving documents, or deleting groups of unnecessary files. Instead of carefully clicking each file name, you can simply mark the items you want.

    How to enable item check boxes

    1. Open File Explorer.
    2. Select View.
    3. Open the Show menu.
    4. Enable item check boxes.

    Beginners often avoid selecting multiple files because keyboard shortcuts feel difficult at first. Item check boxes provide a simpler alternative and can make file management less error-prone.

    Show the Full Path in the File Explorer Title Bar

    When working with many folders that have similar names, it can be particularly challenging to lose track of your current location. Windows normally shows the folder name, but sometimes knowing the complete path can prevent confusion. A full path shows the exact location of a folder, including the drive and all folders leading to it. For example, a document might be stored inside several layers of folders, and the full path helps you understand exactly where it belongs.

    This setting is useful for people who manage work projects, backups, or large collections of files.

    Why folder paths matter

    • They help you confirm you are working in the correct location.
    • They make it easier to explain file locations when asking for technical support.
    • They reduce mistakes when moving or copying important files.

    Even if you do not use this feature every day, understanding folder paths helps you become more comfortable managing files in Windows.

    Use the Navigation Pane to Move Around Windows Faster

    The navigation pane on the left side of File Explorer provides quick access to important locations. Many users ignore it, but customizing this area can make browsing folders much faster.

    You can use it to access drives, cloud storage locations, network folders, and commonly used folders without repeatedly opening new windows. For example, someone who stores files on an external hard drive can keep that location visible in the navigation pane instead of searching for it each time the drive is connected.

    Adjusting the navigation pane

    1. Open File Explorer.
    2. Select View.
    3. Choose the Navigation pane.
    4. Select the options you want displayed.

    A cleaner navigation pane makes File Explorer easier to understand because the places you actually use are always available.

    Common Mistakes

    Customizing File Explorer is generally safe, but beginners sometimes make changes without understanding their purpose. A few simple precautions can prevent problems.

    • Changing system files without knowing what they do
    • Creating too many shortcuts
    • Changing settings without remembering the original option

    FAQs

    1. Can Changing File Explorer Settings Break Windows?Most of these File Explorer customizations are safe, as they simply affect the way files are displayed or accessed. If you show hidden objects and then change or delete system files, you may introduce difficulties. If you’re not sure what a file is, don’t change it.

    2. File Explorer seems different after the update. Why?

    Sometimes Windows upgrades change the menus, layouts, or options that are offered. The essential functionalities will remain the same; however, the position of some options may change.

    3. Should beginners always show hidden files?

    If you don’t constantly debug software or change sophisticated settings, there is no reason to keep hidden files visible all the time. Most users can temporarily enable this option when they need it.

    4. How to speed up File Explorer?

    So, organizing your directories, removing superfluous files, and avoiding folders that are too big might improve the experience. Faster storage technology also influences how quickly files load and folders open.

    5. If I don’t like the modifications, can I reset File Explorer settings?

    Yes. Most of File Explorer’s options can be reset to defaults with Folder Options. You can also manually undo individual modifications, e.g., folder views or Quick Access settings.

    Conclusion

    File Explorer is one of the most utilized programs in Windows, but many people only scratch the surface of what it can achieve. A few minutes of tweaking hidden settings can make everyday work easier and get rid of little irritants that build up over time.

    Start with modest adjustments like exposing file extensions, personalizing Quick Access, updating folder displays, and employing improved search algorithms. These tweaks don’t need technical knowledge but can make your computer feel more structured and predictable.

    The most personalized Windows configuration is not the best one. It’s the one that helps you find, organize, and safeguard your files with minimal work.

    References

  • Windows Privacy Settings And Personal Data Protection

    Windows Privacy Settings And Personal Data Protection

    Many people spend time installing antivirus software, creating secure passwords, and updating their Windows systems. While these are all good habits, many people often overlook another aspect of computer security. Windows privacy settings determine how much information your computer shares, which programs have access to essential functions, and how your personal data is handled daily. Because default settings make setting up and using Windows easier, they may enable features you do not need or use. For instance, an application might request access to your microphone, camera, or location data when it is not actually necessary. Many people grant these permissions without a second thought, just to complete a product download as quickly as possible.

    Checking your privacy settings does not mean you have to disable every feature. Some features can actually enhance security, help recover lost devices, or speed up Windows. You need to understand what each setting does so you can choose the configuration that best suits your computer usage. This article explains key Windows privacy settings in a simple, easy-to-understand way. You will learn which options require attention, which ones are safe to leave enabled, and how to strike a balance between privacy, ease of use, and security.

    Windows Privacy Settings are Crucial

    Every modern operating system collects data for updates, diagnostics, performance optimization, and online services. Windows systems are no exception. The amount of data collected by the system depends on the features, permissions, and privacy settings chosen during and after installation. Privacy is sometimes mistakenly viewed merely as hiding information. In reality, however, it is about controlling access to data and determining which services actually require that data. A weather app, for example, needs your location data, whereas a calculator does not. Windows allows apps to request access to your camera, microphone, contacts, calendar, and notifications. If these permissions are not reviewed over time, dozens of installed apps could end up with unnecessary access to data. Checking these settings every few months allows you to limit unnecessary data sharing without affecting essential functionality.

    Where to Find Privacy Settings in Windows

    Microsoft has grouped most privacy controls into one area, making them easier to review than in older versions of Windows. Although Windows 10 and Windows 11 look slightly different, the overall organization is very similar.

    To begin reviewing your settings:

    1. Open the Start menu.
    2. Select Settings.
    3. Choose Privacy & Security in Windows 11 or Privacy in Windows 10.
    4. Browse each category one at a time instead of changing everything at once.

    Changing one setting, testing your computer, and then moving to the next is usually a smarter approach than disabling numerous features simultaneously. This makes it much easier to identify which setting affects a particular application if something stops working later. You should also visit your Microsoft account privacy dashboard occasionally if you sign into Windows using a Microsoft account. Some privacy preferences related to your online account are managed there rather than directly on your computer.

    Review App Permissions Before They Become a Problem

    One of the easiest ways to improve privacy is by checking which applications have permission to access sensitive parts of your computer. Many users install software over several years without ever reviewing these permissions again. Inside the Privacy & Security settings, Windows separates permissions into categories. Instead of showing one long list, it lets you review access to your camera, microphone, location, contacts, calendar, notifications, file system, and other hardware individually.

    As you open each category, ask yourself a simple question: Does this application genuinely need this permission to perform its main task? If the answer is no, consider turning that permission off.

    Permission When It Makes Sense When to Reconsider Access
    Camera Video meetings and online classes Games or utilities that never use video
    Microphone Voice calls and speech recognition Applications without voice features
    Location Maps and weather apps Desktop tools with no location features
    Calendar Email and scheduling apps Photo editors or media players
    Contacts Email clients Applications unrelated to communication

    Some applications request permission only once during installation. Others may ask again after receiving updates that introduce new features. If a permission request surprises you, take a moment to understand why it is being requested before clicking Allow. It is also worth removing applications you no longer use. An uninstalled program cannot continue accessing your device permissions.

    Understand Diagnostic Data Without Guessing

    Windows privacy features, such as diagnostic data, often spark debate because few people understand what they include. Windows gathers technical data to assist Microsoft discover program crashes, hardware compatibility issues, update failures, and other system reliability concerns.

    Most home users can pick from Windows diagnostic data choices. The restricted option lowers information sharing while allowing Windows to get critical updates and security upgrades. Diagnostic data differs from personal files, photographs, and stored files. Instead, it examines Windows’ operation. However, many users prefer restricting data to what’s essential.

    The settings tab also has individual experience choices. These capabilities adjust suggestions, recommendations, and Microsoft services using diagnostic data. You may eliminate customized suggestions without compromising Windows functioning if you want fewer. Disable features you’ll never use and leave vital security services on. Understanding rather than turning off everything works best for privacy.

    Be Careful Which Apps Can Access Your Location

    Location services might be beneficial if you use maps, weather predictions, or apps to discover local sites. Not all programs need to know where you use your computer. Windows enables two-level location access control. You may disable the functionality or activate it while selecting which applications can utilize it. The second approach balances privacy and convenience better for most individuals.

    Suppose you use a weather app every morning. Let it access your location to avoid entering your city manually. Knowing your location doesn’t help a simple note-taking software. Reviewing permissions this way prevents inappropriate data sharing without reducing Windows’ usefulness. Some Windows services keep a limited location history. Clearing location-based records is a basic housekeeping action that many users neglect if they rarely use them.

    Manage Advertising ID and Personalization

    Each Windows user account has an advertising identification that lets enabled programs offer more tailored ads. This identifier does not reveal your personal data but can be used to target app-based ads. Easy privacy improvement: disable the advertising ID if you don’t want targeted advertising. Applications will display ads, but they may not be personalized to your usage.

    You may also see Windows settings for suggested material, suggestions, and personalized advice. Though created to help consumers discover apps and services, not everyone finds them beneficial. Two benefits commonly result from disabling unneeded suggestions. Data collection is reduced and the Windows interface is cleaner and less obtrusive.

    Check Search Permissions and Cloud Content

    The Windows search box now does more than find files. It can search emails, cloud storage, web material, and internet services depending on system configuration. These new features can save time, especially for Microsoft users. They also imply your device and Microsoft’s online platforms may share more data.

    Review cloud content, SafeSearch, search history, and device history choices under Search Permissions. Consider how you use Windows Search before enabling features. You may prefer a simpler search experience that uses fewer web resources if you mostly search for locally saved documents or installed programs.

    Should You Clear Search History?

    By deleting previously searched things from recommendations, erasing search history sometimes helps increase privacy on shared computers. Simply resets bits of your search history, not your files or applications.

    Don’t Disable Security Features in the Name of Privacy

    Assuming every feature sending data should be off is a typical error. Certain Windows services are designed to safeguard your device. Microsoft Defender, SmartScreen, automated security updates, and device encryption protect your PC. These services may use Microsoft servers to detect malware, validate downloads, and provide security fixes.

    Disabling these measures generally increases danger more than privacy. A protected computer with proper privacy settings is usually preferable than an isolated machine without security.

    Feature Recommended for Most Users Reason
    Microsoft Defender Keep Enabled Provides built-in malware protection.
    Windows Firewall Keep Enabled Blocks unauthorized network connections.
    SmartScreen Keep Enabled Helps detect unsafe websites and downloads.
    Automatic Updates Keep Enabled Installs important security fixes.
    Device Encryption (if available) Usually Enable Protects data if the computer is lost or stolen.

    Privacy and security work together. Disabling security tools simply because they communicate with trusted Microsoft services often leaves your computer more vulnerable to real threats.

    Simple Privacy Habits That Make a Bigger Difference Than Any Setting

    Privacy settings are only one part of protecting your personal information. Everyday habits often have an even greater impact.

    • Install software only from trusted sources.
    • Remove applications you no longer use.
    • Review app permissions every few months.
    • Use a standard user account for daily activities when practical.
    • Lock your computer whenever you leave your desk.
    • Keep Windows and installed software updated.
    • Use strong, unique passwords and enable multi-factor authentication whenever available.

    Another good habit is reading permission requests instead of approving them automatically. Taking a few extra seconds during installation can prevent unnecessary access to your camera, microphone, contacts, or location later. If you share your computer with family members, create separate Windows accounts instead of sharing one login. This keeps personal files, browser history, and privacy settings separate for each person.

    Finally, remember that privacy is not something you configure once and forget. New applications, major Windows updates, and changing personal needs can all affect which settings make sense for you. Spending a few minutes reviewing them every few months is usually enough to stay in control.

    Conclusion

    Windows includes many privacy controls because modern computers handle much more personal information than they did in the past. Your files, online accounts, communication tools, camera, microphone, and location services all connect through one operating system, making permission management an important part of responsible computer use.

    The best approach is to review privacy settings with a practical mindset. Keep features that improve your experience, remove permissions that do not make sense, and avoid disabling security tools that protect your device. A few thoughtful changes can make your computer feel more private without making Windows difficult to use. Once you understand where these settings are located and what they control, maintaining your privacy becomes a simple routine rather than a complicated technical task.

    FAQs

    1. Does changing Windows privacy settings make my computer faster?

    Privacy changes usually have a small effect on performance rather than creating a dramatic speed improvement. Some users may notice fewer background activities after disabling features they do not use, but the main benefit is greater control over data sharing rather than faster hardware performance.

    2. Should I disable all Windows data collection?

    No. Some data collection features support important services such as security updates, troubleshooting, and system reliability improvements. A better approach is reviewing available options and choosing settings that match your comfort level while keeping essential protections active.

    3. Can Windows apps access my camera or microphone without permission?

    Normally, Windows provides permission controls that allow you to manage camera and microphone access. You can review which applications have access and disable permissions for programs that do not need these features.

  • Extend Laptop Battery Life with Smarter Windows Power Settings

    Extend Laptop Battery Life with Smarter Windows Power Settings

    A fast-draining laptop battery can ruin a productive day. Many laptop owners think an aged battery is the main reason it won’t last a few hours, but software settings often play a bigger role. Windows has various power management capabilities to balance performance and battery life. Unfortunately, many computers are set for performance rather than battery life. A few smart changes can save energy without slowing your PC.

    You can improve battery performance without technical expertise. Set power modes, regulate background activity, lower screen brightness, and manage launch programs to save energy on your laptop. This guide discusses Windows power settings, which choices to change, and how to set up a battery-friendly laptop for your usage.

    Windows Power Settings Impact Laptop Battery Life

    Your laptop needs energy for every job. Opening a browser tab, making a video chat, syncing files, upgrading apps, or using wifi connections drains the battery. Windows continually regulates these operations, but default settings may waste battery life. Laptops often balance speed and energy use. This configuration works great for daily tasks but may not be perfect when you’re without a charger for several hours. A laptop for library writing needs a different power profile than one for gaming or video editing.

    Power options control how intensely your laptop utilizes its processor, when the screen turns off, how quickly it enters sleep mode, and how background programs behave. These minor modifications can save power. If your laptop screen stays bright for 15 minutes after you turn it off, it wastes power. Similarly, dozens of background applications might use system resources when not in use.

    Configure Windows Power Mode

    Windows Power Mode provides the easiest battery life boost. Windows balances performance and energy use with this setting. Users can prioritize laptop speed or battery efficiency. Modern Windows versions typically include these choices under Settings, System, and Power & battery. The modes offered depend on your laptop brand and hardware. Energy-efficient modes save power when battery life is a concern. Switch back to high performance for demanding jobs.

    Power Mode Best Used For Battery Impact
    Best power efficiency Web browsing, documents, emails, studying Uses less energy by limiting unnecessary performance demands
    Balanced Daily general use Provides a middle ground between speed and battery usage
    Best performance Gaming, editing, demanding software May reduce battery runtime because more power is available

    A common mistake is leaving a laptop permanently set to maximum performance. While this may make applications respond slightly faster, many everyday activities do not need that extra processing power.

    Adjust Screen Settings to Reduce Battery Drain

    Displays are one of the biggest laptop power consumers. Bright screens are comfortable, but they use more battery power. Reducing brightness doesn’t make work uncomfortable. Finding a realistic level for clear viewing while conserving electricity is the goal. Many users leave brightness high since they’ve never altered it.

    Windows has screen-off settings too. Reduce the display’s dark time to save battery life when you leave your laptop. If your laptop keeps the screen active for 30 minutes after inactivity, several minutes of unnecessary display time can mount during the day. Changing this setting to a shorter period can improve mobile use. Find screen and sleep controls in Windows power settings to change these choices. Choose times that fit your habit, not defaults.

    Control Battery-Eating Background Apps

    Many laptop users close visible apps but ignore background ones. These hidden processes might check for updates, sync data, issue notifications, and use internet connections when you’re not using them. An automatically starting music app, a cloud storage service transferring files, or a background chat program may seem harmless. When multiple programs do this, they drain your battery continuously.

    Windows tools show which apps use system resources. Task Manager shows active processes and their CPU, memory, and network usage. Know what the app does before disabling. Some Windows, security, and hardware features require background processes. Removing critical system processes can harm battery life.

    Utilize Battery Saver Features for Extra Runtime

    Windows has battery-saving functions for use without a charger. These settings limit background activities and system activity to save battery life. Battery Saver is useful when your battery is low and you need to finish important work. Not meant to replace power settings, it adds energy management as needed.

    Settings > System > Power & battery normally enables battery-saving options. Windows may activate automatically when the battery reaches a certain percentage. A train passenger may want Battery Saver to activate at 30% battery. This eliminates background activity and frees up power for vital tasks. Keep in mind that battery-saving options may compromise convenience. Some apps may delay background updates and notifications. Many users prefer a balanced approach to battery-saving features for daily use.

    Control External Devices and Wireless Connections

    Wireless functions are convenient yet energy-intensive. Wi-Fi, Bluetooth, and linked accessories constantly use your laptop’s battery. When working offline, turning off Wi-Fi reduces unwanted activity. Disabling Bluetooth while not using wireless headphones, mouse, or other devices stops your laptop from keeping unneeded connections.

    External USB devices can draw electricity. Portable hard drives, USB lighting, charging cords, and various accessories can drain power even while not in use. Simple habit: unplug unnecessary devices. Basic writing and surfing on a laptop rarely requires multiple accessories.

    Choose Sleep Settings That Match Your Routine

    Sleep mode saves energy and lets you work faster. However, improper sleep settings can drain the battery or delay. Laptops use power when left awake for lengthy durations. Adjusting sleep timing reduces Windows’ energy usage when not in use.

    Many people find a brief idleness period before bedtime useful. Someone who constantly checks their laptop during brief intervals may choose a longer duration, while someone who forgets to close the lid may benefit from more aggressive power-saving settings. Laptop users should also know the difference between sleep and hibernation. Sleep stores your current session and uses little power. Hibernate stores your session and requires little energy, making it beneficial for long laptop downtimes. The best decision relies on habits. Students who switch schools may want speedy sleep recovery, whereas those who store a laptop overnight may prefer hibernation.

    Update Windows and Drivers for Efficiency

    Updates go beyond adding features and correcting security risks. Windows and hardware driver updates can also boost laptop power efficiency. Processors, graphics chips, Wi-Fi adapters, and battery controllers receive regular driver updates. Hardware can communicate better with Windows after these updates.

    Long-term neglect of upgrades may keep your laptop running older software that doesn’t take advantage of efficiency gains. However, time matters. Large updates take more battery while downloading, installing, and resuming. If your battery is low, charge before big updates.

    Common Laptop Battery-killing Mistakes

    Not only Windows settings can improve battery life. Daily activities also affect laptop power efficiency. Common mistakes gradually degrade battery performance. Overopening applications is a mistake. Modern laptops can run numerous programs, but each uses system resources. Unneeded programs are closed to reduce processing.

    Also typical is ignoring browser tabs. A browser with dozens of tabs may run programs, refresh content, or use memory in the background. Tab management and closing unwanted ones help save laptop workload. Many people leave their laptops connected to unused accessories. Even while inactive, external drives, gaming controllers, USB devices, and wireless gadgets can take power. Battery condition also affects lifespan. Software settings can save energy, but they cannot revive a battery that has lost capacity after years of use.

    Windows Battery-Friendly Routine

    Multiple tiny modifications are usually more effective than one setting for battery improvement. A well-set-up laptop uses energy more efficiently without hindering productivity. When working without a charger, switching to an energy-efficient power mode, decreasing screen brightness, and dismissing unnecessary apps can be straightforward.

    Check battery settings before leaving home or work. It takes a few seconds but keeps your laptop from losing power early. Avoid restricting your laptop. The right power configuration should support your work style and reduce waste. The apps and functionalities you require should work.

    • Use energy-efficient power modes during normal tasks.
    • Adjust display timeout settings based on your working habits.
    • Remove unnecessary startup applications.
    • Enable battery-saving features when battery levels become low.
    • Disconnect unused accessories and wireless devices.
    • Keep Windows and hardware drivers updated.

    FAQs

    1. Does dimming the screen really extend your laptop’s battery life?

    Yes. Screen brightness consumes a significant amount of power, especially at high levels. Lowering the brightness to a comfortable setting can extend your laptop’s battery life.

    2. Should Windows power-saving mode always be enabled?

    Not necessarily. While power-saving mode can extend runtime, some people prefer standard power settings for daily tasks. A balanced configuration usually provides a better experience.

    3. Does closing applications help save energy?

    Closing unnecessary applications can help if they are actively using CPU, memory, or network resources. However, not all background processes need to be closed, and doing so does not always lead to significant energy savings.

    4. Do Windows updates extend battery life?

    Sometimes. Updates can include improvements to power management, drivers, and system efficiency. Keeping Windows up to date allows your laptop to use the latest, optimized versions.

    5. Sleep mode vs. shutting down: which is better for your laptop?

    Sleep mode is ideal for short breaks, as it allows you to resume using the laptop quickly. If you won’t be using your computer for an extended period, you can save energy by shutting it down or putting it into hibernation.

    6. My laptop battery still drains very quickly, even after adjusting the settings. Why is that?

    If the problem persists after changing settings, it could be due to an aging battery, power-intensive software, overheating, or a hardware fault. Check the battery health and power consumption to identify the cause.

    References

    Final Thoughts

    There’s no sophisticated software or extensive technical knowledge needed to extend the life of your laptop battery. Many of the means for controlling energy use are already part of Windows; the trick is to arrange them to match your actual use of your laptop.

    Little things like controlling power modes, eliminating needless background activities, and using smarter sleep settings can lead to a more reliable everyday laptop experience. It’s not about making your laptop slower or taking away important functions to create a battery-friendly setup. It’s all about helping your gadget use energy where it matters most.

  • First Mac Setup Settings You Should Never Skip

    First Mac Setup Settings You Should Never Skip

    Setting up a new Mac is incredibly easy. Choose your language, connect to Wi-Fi, and sign in with Apple, and the desktop launches. Many people hesitate at this point because the computer appears ready to use. However, the first few minutes after setup are critical to maximizing your Mac experience. Certain settings you might overlook can impact your privacy, security, battery life, file management, and overall ease of use.While your Mac’s default settings are fine, they are designed for the average user. You may have different needs—such as stricter privacy settings, simpler backups, a tidier desktop, or enhanced security. This article covers several options that beginners often overlook during setup but later regret missing. These changes are straightforward—most take only a few minutes—but they can help you avoid frustrating problems later.

    Complete the Basic Setup First

    Make sure to complete the Mac setup process before altering privacy or performance settings. Some users rush through the Apple Setup Assistant screens regarding account connections and system preferences without fully understanding what they are agreeing to. Your Mac requires an Apple account during setup; this account links to iCloud, Find My, App Store purchases, messages, and device synchronization. Changing account details later can lead to corrupted files, images, or backups, so ensure you use the correct account from the start.

    If you own an iPhone or iPad, using the same Apple account improves compatibility. Account settings affect features like iCloud Drive, shared photos, and text copied between Apple devices. Inexperienced Mac users often create a temporary account during setup, assuming they can sort out the details later. While this approach is possible, it frequently leads to unnecessary issues. It is advisable to take a moment during setup to choose the account details, computer name, and settings you actually need.

    Your Mac password protects not only your desktop but also passwords, personal files, browsing history, and data from other devices. Many people use passwords that are easy to remember but also easy to guess. It is best to use a password unique to your Mac—one that you do not reuse on other websites. Enable Touch ID during Mac setup; it speeds up unlocking your device and protects it against unauthorized access.

    Enable FileVault for Enhanced Security

    FileVault is essential for the security of modern Macs. Encrypting your primary drive makes it much harder for others to access your files if your computer is lost or stolen. Without encryption, anyone with physical access to the computer is far more likely to be able to access stored data. FileVault enhances security by requiring users to provide login or recovery credentials before accessing data.

    Students, remote workers, travelers, and professionals who use laptops to store personal or work data will all benefit from FileVault. To check this setting, go to System Settings → Privacy & Security → FileVault. If you disable FileVault, macOS will prompt you to turn it on.

    Before you enable FileVault, reviewing your recovery options is important. Losing your login password and recovery information makes recovering encrypted data much more difficult.

    Check your Privacy Settings Before Installing Apps

    A newly set-up Mac—even one with just a few apps—might give the impression that your privacy is protected. However, once you start downloading apps, your privacy settings become crucial. Apps often require access to your files, camera, microphone, location data, contacts, and more.

    The permissions themselves aren’t necessarily harmful. Video calling apps need access to your camera and microphone, while photo editing apps might need access to your photo library. The problem arises when users grant all permissions without carefully checking whether the app actually needs them. Check your privacy settings before installing multiple apps. Go to ‘System Settings’ → ‘Privacy & Security’ to view the available categories. Here, you can check whether an app has access to sensitive features or holds editing permissions.

    Check These Privacy Areas First

    • Location Services: Decide which apps can see your approximate location. Many apps do not need constant location access.
    • Camera and Microphone: Review apps that can use these features, especially after installing communication or recording software.
    • Files and Folders: Some applications request access to documents or desktop folders. Only allow access when it makes sense.
    • Full Disk Access: This is a powerful permission that is usually needed only by specific trusted tools, such as backup or security software.

    A useful habit is reviewing permissions again after a few months. Many people install apps quickly when they first get a Mac and later forget which programs they gave access to.

    Enable Automatic macOS Updates

    Keeping macOS up to date is one of the simplest ways to protect your computer. Updates include not only new features but also bug fixes, security upgrades, driver updates, and compatibility adjustments. New Mac users sometimes delay updates for fear of disrupting their work. While it is understandable to postpone major updates on essential business laptops, ignoring updates for too long can lead to problems. Go to System Settings → General → Software Update to view your update options. Enabling automatic updates allows your Mac to apply important improvements automatically without manual intervention.macOS updates generally fall into different categories. Minor updates typically address security and stability issues, while major operating system updates may introduce new features and design changes. If you use your Mac for work, study, or professional software, check for compatibility before installing major macOS updates; some specialized applications may require updates of their own. Enabling automatic security updates and checking for major improvements before installation is a standard maintenance routine.

    Enable Time Machine Backup Early

    A common mistake among new Mac users is waiting too long to start backing up their data. After a few months, your computer could stop working due to hardware issues, accidental file deletion, or software problems. Time Machine is Apple’s built-in backup feature; it automatically saves copies of your files to a suitable external storage device, making it easy to restore specific files or your entire system. Backups should be set up immediately rather than postponed, as people often lose files they hadn’t realized were important. Most users should protect irreplaceable photos, documents, creative work, assignments, and downloaded information. A full backup is different from synchronization, which is what iCloud Drive offers. Deleted or modified files may be reflected across synchronized devices. Separate backups enhance security. An effective setup combines automatic local backups with cloud services used as needed. This provides you with multiple options should your Mac or storage device fail.

    Customize iCloud Settings Instead of Accepting All

    iCloud is linked to many Apple services, but not everyone needs every option. macOS may recommend various iCloud features during setup. While these features can be useful, it is important to understand what they do. Go to Settings → Apple Account → iCloud to review your options. Here, you can manage iCloud Drive, Photos, Mail, Contacts, Calendars, Notes, and device backups.

    Many users find iCloud Photos and Drive very convenient, as they allow for the synchronization of important files across Apple devices. Free iCloud storage is limited, so users with large photo libraries need to manage their storage usage carefully. Another common mistake is enabling all synchronization options without considering privacy or storage space. It is wiser to enable the service and periodically evaluate how you use it.

    Customizing Finder to Optimize Daily Workflows

    Many beginners never change the file and folder management settings in Finder on their Mac. With a few simple adjustments, you can streamline how you search for documents and manage downloads and storage. Open Finder and go to the sidebar. The sidebar gives you access to frequently used locations, such as ‘Documents,’ ‘Downloads,’ ‘External Drives,’ and ‘iCloud Drive.’ You can add important folders that are missing via the Finder options.

    Displaying file extensions is also useful. By default, macOS hides various file extensions to simplify the interface. However, extensions like .pdf, .jpg, and .docx can help beginners recognize file types. To view all file extensions, go to Finder → Settings → Advanced and select that option.

    On a new Mac, the ‘Downloads’ folder is often the most cluttered. Browser downloads, email attachments, installers, and temporary files pile up quickly. Start by developing a basic habit: move important downloaded files to a more convenient location instead of leaving them in the ‘Downloads’ folder. This simple action can speed up future searches. Finder tags allow you to label files based on their purpose. You can tag files as ‘work,’ ‘personal,’ or ‘urgent.’ Users who manage a large number of files may find the tagging feature beneficial (tags are optional).

    Adjust Battery Settings to Protect Your Mac

    Battery settings are worth reviewing even if your new Mac lasts all day. The choices you make can affect long-term battery health and how efficiently your computer uses power.

    Open System Settings → Battery to review available options. Depending on your Mac model and macOS version, you may find settings related to energy usage, charging behavior, and battery health management. One helpful feature on supported Macs is optimized battery charging. This feature learns your charging habits and can reduce the time your battery spends fully charged, which may help slow battery aging.

    Simple Battery Habits That Help

    • Avoid unnecessary heat: Excessive heat can affect battery performance over time. Keep ventilation areas clear and avoid using your Mac on soft surfaces that block airflow.
    • Use the right charger: Use an appropriate charger and cable designed for your Mac. Poor-quality accessories may not provide reliable power.
    • Do not worry about normal charging: Modern Mac batteries are designed for regular daily use. Occasional charging throughout the day is normal.

    Battery management is less about following strict rules and more about avoiding conditions that create unnecessary stress on the hardware.

    Install Essential Apps Carefully

    A new Mac can feel exciting, and many users immediately install dozens of applications. This often creates the opposite of what they want: a cluttered system with apps they rarely use. Start with the applications you genuinely need. A browser, password manager, communication tools, productivity apps, and backup-related software are usually more useful than downloading large collections of utilities. Always download applications from trusted sources. The safest option is usually the official Mac App Store or the developer’s legitimate website. Avoid random download pages that bundle extra software with installers.

    Be Careful With “Cleaning” and optimization apps.

    New Mac users often search for tools that promise faster performance, automatic cleaning, or instant problem-solving. Some applications can be useful, but many are unnecessary and may create more problems than they solve. macOS already includes tools for managing storage, monitoring activity, and handling many maintenance tasks. Before installing a system utility, understand exactly what it does and whether you actually need it. A smaller collection of trusted applications usually creates a smoother experience than installing many tools that run in the background.

    Enable Find My Mac Before You Need It

    Find My is one of those settings people appreciate most when something goes wrong. It can help locate a lost Mac and provides additional protection if the device is misplaced. Check that Find My Mac is enabled through your Apple account settings. This feature works together with Apple’s Find My network, allowing compatible devices to help locate your Mac.

    A common mistake is assuming this feature is automatically enough to recover a lost computer. It works best when combined with other security habits, including a strong password and FileVault encryption. If you travel with your Mac frequently, enabling Find My should be one of the first things you check after setup.

    Common First-Time Mac Setup Mistakes to Avoid

    Most Mac setup problems do not come from complicated technical issues. They usually happen because small decisions are skipped during the first few days of ownership. Avoiding these mistakes can save time and prevent frustration later.

    • Skipping Backups Because the Mac Is New
    • Installing Too Many Apps Immediately
    • Ignoring Privacy Permissions
    • Not Learning Basic Mac Shortcuts

    A Simple Long-Term Maintenance Routine

    Good Mac maintenance does not require constant attention. A few simple habits are enough to keep most systems running smoothly.

    • Install important macOS updates regularly.
    • Confirm that backups are working instead of assuming they are.
    • Remove applications you no longer use.
    • Review privacy permissions occasionally.
    • Keep enough free storage space available.
    • Restart your Mac occasionally if it has been running for a long time.

    The goal is not to constantly manage your computer. The goal is to create a setup that quietly protects your files and supports the way you actually use your Mac.

    FAQs

    1. Should I enable FileVault on my new Mac?

    For most users—especially those who use their Mac away from home—enabling FileVault is a sensible security measure. It protects your stored data by encrypting the drive. Just make sure you have a secure recovery method in place before enabling FileVault.

    2. Should I install antivirus software on my new Mac?

    macOS comes with built-in security features designed to protect you against common threats. If you keep macOS up to date, download applications from trusted sources, and practice safe browsing habits, most users do not need additional antivirus software.

    3. What are the alternatives to iCloud or an external backup drive?

    They serve different purposes. iCloud is used to sync specific files and data across Apple devices, but it is best to have an external backup solution—such as Time Machine—to recover files in the event of accidental deletion or system issues. Many users utilize both.

    4. How often should I update my Mac?

    Install important security updates as soon as they become available. If you use your Mac for critical business tasks, always check the compatibility of essential applications before performing a major macOS update.

    5. Can I change these settings later?

    Yes. Most macOS settings can be adjusted in System Settings. However, it is best to enable preventive measures—such as backups and encryption—right from the start, so they are effective immediately rather than being implemented only after problems arise.

  • Reclaim Valuable Disk Space Without Deleting Important Files

    Reclaim Valuable Disk Space Without Deleting Important Files

    Your computer starts warning you that your storage space is running low. Programs launch slowly, system updates fail to install, and saving new photos or documents becomes extremely difficult. Many people react immediately by deleting files they recognize, but such actions can lead to new problems—such as accidentally deleting important files. The good news is that freeing up hard drive space doesn’t necessarily mean you have to get rid of all your personal files. Over time, modern operating systems quietly consume storage space with various temporary data, cache files, old installation files, and system remnants that are no longer needed. Once these files are no longer required, they are usually of little value.

    The trick isn’t to delete every file, but to identify exactly which files are taking up space on your computer. By locating unused data and safely removing it, you can free up terabytes of space without losing important documents, photos, or applications. This article offers practical tips for beginners on how to free up space, avoid costly mistakes, and keep your computer running smoothly without putting valuable information at risk.

    See What’s Really Eating Up Your Storage

    Before deleting any files, it is crucial to understand what is consuming your disk space. People often assume that personal data—such as photos and videos—is the primary cause of insufficient storage, but computers often harbor other hidden space-hogs that are easily overlooked. When you install updates, create documents, browse the web, or run applications, the operating system may generate temporary files. Programs also create cache files to speed up startup times, but over time, these files can grow much larger than expected. Outdated software is another common cause of a lack of disk space. You may have downloaded applications months or even years ago and stopped using them, yet they remain installed on your computer and continue to take up space. To avoid wasting storage, first check how much space you are currently using. Instead of deleting folders at random, focus on areas where you can free up a significant amount of space.

    Common sources of unnecessary disk usage

    Storage area What it contains Usually safe to review?
    Temporary files Short-term files created by Windows, applications, and installers Yes, after checking what will be removed
    Downloads folder Files downloaded from websites, email attachments, and installers Yes, but review manually first
    Unused applications Programs you no longer use Yes, if you know you do not need them
    Browser cache Saved website data used to improve loading speed Usually safe to clear
    Old update files Previous system installation and update leftovers Usually safe through built-in tools

    Start With Built-In Storage Cleaning Tools

    The safest way to free up disk space is usually by using the operating system’s built-in tools. These tools have a deeper understanding of system files than third-party cleanup programs and minimize the risk of accidentally deleting important files. Windows includes built-in storage options that can identify temporary files, Recycle Bin contents, and other categories of removable files. Windows also offers a program called “Disk Cleanup” to remove unwanted system files.

    On macOS, the “Storage Management” feature helps users view categories that take up space, such as large files, unused applications, and so on. It does not automatically determine what you need, but it provides a clear overview before you make any changes.

    Clean Temporary Files Without Removing Personal Data

    Temporary files exist for a reason. They are created by applications during execution and used during operating system updates and installations. The problem is that these files can persist for a long time, even when they are no longer needed. For example, a software installer might download several gigabytes of installation files; once the application is installed, these files may no longer be required. Failed updates can also leave behind numerous temporary folders that the system does not automatically clean up.

    Deleting temporary files can often free up a significant amount of storage space without affecting your personal files. However, it is advisable to review the list of files to be removed before proceeding.

    Helpful habit: Create a backup of important files before performing major storage cleanup, especially if you are unsure about a folder or file type.

    Remove Applications You No Longer Use

    Installed programs are one of the easiest places to recover storage because many applications take up much more space than people expect. A game, video editor, design tool, or old utility can occupy several gigabytes even if you have not opened it for months. Many users keep software installed because they forget it exists. Over time, computers collect trial programs, duplicate applications, outdated tools, and software that users only needed for a one-time task. Before uninstalling anything, review the application list carefully. Do not remove programs simply because you do not recognize the name. Some unfamiliar applications are important system components or drivers required for hardware to function correctly.

    A safer way to decide what can be removed

    1. Check when you last used the application:
      If you have not opened a program in a long time and have no future need for it, it may be a good candidate for removal.
    2. Look for duplicate software:
      Some computers contain multiple programs that perform similar tasks, such as several media players or image editors.
    3. Keep essential tools:
      Avoid removing drivers, security software, or applications you do not understand.

    Uninstalling unused software also has another benefit. It reduces background processes that may run automatically when your computer starts, which can sometimes improve overall system responsiveness.

    Review Large Files Instead of Deleting Random Data

    When storage is running low, many people begin searching through folders and deleting files based on appearance. This approach is risky because file names are not always a reliable indicator of importance. A better method is to find the largest files first. Large videos, old backups, downloaded installers, archived projects, and duplicate files often consume significant space while remaining forgotten. Storage analysis tools built into modern operating systems can help identify large categories of files. You can then decide whether to move them to external storage, cloud storage, or remove them if they are no longer needed.

    Files worth reviewing carefully

    • Old installation files: Software installers that were downloaded months ago may no longer be needed after installation.
    • Duplicate photos and videos: Multiple copies of the same media can quietly consume large amounts of space.
    • Large archives: ZIP or backup files may contain old data that you have already saved elsewhere.
    • Screen recordings: Video captures can become surprisingly large, especially at high quality.

    Avoid deleting files from system folders unless you know exactly what they are. The biggest storage problems are usually found in personal folders, old downloads, and unused applications rather than essential system files.

    Manage Your Downloads Folder Before It Becomes a Storage Problem

    The Downloads folder is one of the most common places where unnecessary files accumulate. People often download documents, images, software installers, and email attachments but never return to remove them. Unlike carefully organized folders, Downloads is usually a temporary holding area. A file that was useful when first downloaded may have no purpose months later. Creating a simple review routine can prevent this folder from becoming a hidden storage drain. For example, you might check your downloads every few weeks and remove installers or files you no longer need.

    Before deleting downloads, check:

    • It is unclear whether the file is saved somewhere else.
    • Whether it contains important documents or records.
    • It is unclear whether it is only an installer that can be downloaded again if needed.

    Avoid deleting everything in Downloads automatically. Some users store important PDFs, work documents, or personal files there and forget they have not moved them.

    Clear Browser and Application Cache Carefully

    Applications use cache files to speed up their operation by saving frequently used information on the local disk. A web browser might store images and website data so that pages load faster on subsequent visits. The difficulty is that cache storage can build up over time. You have used a browser every day for years. A lot of transient webpage data might build up.

    Clearing cache files is generally harmless, although there is a slight trade-off. It may take a little longer for websites and applications to load the first time after you clear them, since the data has to be downloaded anew. Application-specific cache should be used more carefully. Some apps save temporary working files that may contain partial projects or settings. Always inspect what an application’s cleanup option cleans before you confirm.

    Transfer Files Before Deleting

    Sometimes you don’t have to permanently delete data to save up disk space. There are plenty of useful giant files that just don’t need to be on your main drive. You may also expand space and yet keep your contents accessible using external hard drives, USB storage devices, or cloud storage services. This is especially great for family photos, videos, completed projects, and older documents. Moving files might also help in making your computer easier to manage. Your main drive is for the operating system and programs, but long-term storage is something different.

    Good candidates for moving

    • Completed video projects.
    • Large photo collections.
    • Old work documents.
    • Backups that are no longer needed on the main drive.

    Remember to keep backups of important files. A single copy stored on one device is not a complete backup strategy because hardware failures, accidental deletion, or damage can still result in data loss.

    Prevent Storage Problems Before They Return

    Cleaning your drive once can solve an immediate storage problem, but long-term maintenance prevents the same situation from happening again. A computer naturally collects temporary files, downloads, application data, and updates over time, so storage management works best as an ongoing habit. You do not need to spend hours organizing files every week. Small actions performed regularly can make a noticeable difference. Reviewing large files occasionally, removing unused applications, and keeping downloads organized can prevent your drive from slowly filling up again.

    Simple habits that keep storage under control

    • Review large files regularly: Check your storage usage every few months and look for files that are no longer useful.
    • Remove unused applications: Uninstall programs that you no longer use instead of allowing them to occupy space indefinitely.
    • Organize important files: Store documents, photos, and projects in clear folders so you know what can safely be removed later.
    • Keep backups: Store copies of valuable files on another device or a trusted backup service.
    • Avoid unnecessary downloads: Delete old installers and temporary files after completing software installations.

    A clean storage system also makes future troubleshooting easier. When your files are organized, it becomes much simpler to identify what is taking space and what can be safely removed.

    Common Storage Cleanup Mistakes to Avoid

    Freeing disk space is usually safe when done carefully, but mistakes can cause unnecessary problems. Many storage issues happen because people remove files without understanding their purpose.

    • Deleting unfamiliar system files
    • Using aggressive cleaning software without checking settings
    • Ignoring backups before major cleanup
    • Keeping unnecessary duplicate files

    Full Drive May Signal a Bigger Issue

    Sometimes storage fills quickly after cleaning. This may indicate a deeper concern if it happens frequently. Applications generating a lot of data, failed updates, backup systems making multiple copies, or other background operations saving files automatically can create a fast-filling drive.

    Find out which folders are growing if you see unusual storage growth. Locating the source is usually better than deleting files without knowing why space vanishes. Hardware constraints can also contribute. Older computers with small storage drives may need storage upgrades or improved file management.

    References