
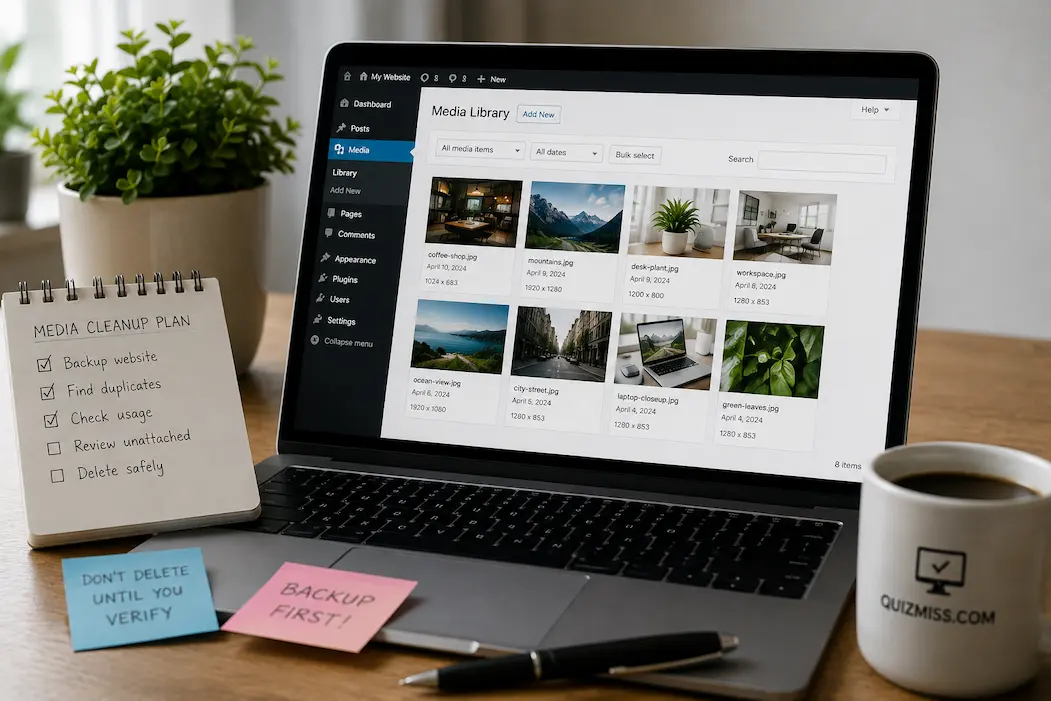
A WordPress Media Library can become surprisingly difficult to manage once a website has been running for a while. Images get uploaded for old posts, revised versions remain on the server, unused files accumulate, and filenames become harder to recognize. The Media Library may eventually contain thousands of items, even though the site uses only a portion of them.
The dangerous part is that an image that looks unused isn’t necessarily unused. It might appear on an older post, inside a reusable block, as a featured image, in a widget, or through a plugin that references the file without making the relationship obvious in the Media Library. Deleting it can leave broken images or missing assets somewhere else on the website.
A safer cleanup process therefore isn’t about deleting everything WordPress labels as unattached. It’s about identifying what can be removed, checking where important files are being used, and making a backup before making irreversible changes. Once you approach the Media Library that way, cleaning it becomes much less risky.
First, Understand What the Media Library Is Actually Showing
The WordPress Media Library is not simply a list of pictures currently visible in your posts.
It can contain images, PDFs, videos, audio files, documents, logos, icons, and other uploads. Some may be actively used on published pages, while others may have been uploaded and never used. There can also be files that are technically associated with a post but are no longer visible in its current content.
This distinction matters because WordPress doesn’t always provide enough information in the standard Media Library screen to determine whether an attachment is genuinely disposable.
Before deleting anything, look at the attachment details and understand how the file entered the site. A file uploaded years ago for a campaign, article, landing page, or theme customization deserves more caution than an obvious duplicate sitting in a folder with several nearly identical versions.
Back Up Before You Start Deleting
This is the part of media cleanup that is easiest to skip and hardest to regret.
Before removing a large number of files, make a current backup of both the WordPress database and the site’s files. An image file by itself isn’t the whole story; WordPress stores attachment information in the database, while the actual uploaded media is stored in the site’s file structure.
A backup gives you a recovery option if you discover that an important image disappeared from an article after cleanup. Without one, recovering deleted media can become considerably more complicated.
If your hosting provider already performs automated backups, verify that the backups are recent and that you know how restoration works. Don’t assume that “the host has backups” automatically means you can recover a specific deleted image quickly.
Don’t Test Your Backup After the Cleanup
A backup is useful only if you understand what it contains and whether it can actually be restored.
If possible, know where your site’s backup is stored and whether it includes the database as well as wp-content/uploads. For a larger cleanup, having a recent backup before the first deletion is much safer than relying on a backup created several days earlier.
Start With the Obvious Duplicates
Duplicate media is usually a better first target than files that WordPress simply describes as unattached.
For example, you might find homepage-banner.jpg, homepage-banner-1.jpg, homepage-banner-2.jpg, and several resized or revised versions. But don’t assume that every similarly named file is unnecessary. One version may still be used by an older article or another part of the website.
Open the files and compare them where necessary. Look at their dimensions, visual content, upload dates, and where they appear in your site.
If two files are genuinely identical and only one is being used, removing the redundant copy can be a relatively straightforward cleanup. If you cannot establish that, leave the file alone until you can verify its role.
What “Unattached” Really Means
WordPress can show media items as Unattached, but this label should not be interpreted as “safe to delete.”
An unattached attachment generally means WordPress doesn’t currently associate the media item with a particular post or page in the way the Media Library expects. It does not prove that no part of your website references the file.
A manually inserted image URL, a theme component, custom HTML, a widget, a plugin, or another part of the site can still reference a file without giving it the attachment relationship you’re expecting.
That is why bulk-selecting every unattached image is a poor cleanup strategy.
Treat “Unattached” as a Starting Point
The unattached filter can still be useful. It narrows down the collection and gives you a group of files worth investigating.
For each potentially removable file, ask:
- Is the image visible anywhere on the site?
- Is it used as a featured image?
- Does a page builder or plugin reference it?
- Is its URL present in custom HTML or CSS?
- Is it an old file that is genuinely no longer needed?
Only after those questions have reasonable answers should deletion enter the picture.
Check Featured Images Separately
Featured images deserve particular attention because they can be easy to overlook.
An image may not appear inside the main body of an article but can still be used as the post’s featured image. Depending on the theme, it might appear on the article page, category archive, homepage, related-post section, search results, or social-sharing metadata.
Before removing an older image, open the relevant posts and check whether it is being used as a featured image.
If your site has hundreds or thousands of posts, don’t attempt to manually inspect everything at once. Concentrate on the media files you have already identified as potential deletion candidates.
Old Images Can Still Be Valuable
A file being old doesn’t automatically make it useless.
An older article may still receive search traffic. A historical image might be referenced from an evergreen page, an archive, or a comparison article. Removing it because it was uploaded several years ago can create a problem that isn’t immediately visible.
The better question is whether the file has a current role on the website.
If an image belongs to an article that was permanently removed and has no other use, it becomes a much stronger deletion candidate. If the article is still live, investigate before removing the image.
Search the Website for the Image URL
For files you’re uncertain about, checking whether the file URL appears elsewhere on the site can provide useful evidence.
Suppose an image has a URL similar to:
example.com/wp-content/uploads/2024/07/example-image.jpg
Searching your site’s content or database for that filename can reveal references that aren’t obvious from the Media Library.
This can be particularly useful for images inserted through custom HTML, widgets, page builders, or manually edited content.
However, don’t treat a search with no result as absolute proof that the image is unused. Some references can be generated dynamically, stored differently, or created by plugins.
Be Careful With Page Builders
Websites built with page builders can make media cleanup more complicated.
A visual editor may store content differently from the standard WordPress editor, and an image might be referenced inside a template, reusable section, global block, popup, or other design element.
If your website uses a page builder, identify how it handles media before deleting files in bulk.
The same principle applies to custom themes. A logo, background image, icon, or decorative asset might be referenced by theme settings rather than a normal post or page.
Check Widgets and Theme Customizations
An image can also be used outside the main post content.
Look at areas such as:
- Site logos
- Header images
- Footer graphics
- Sidebar widgets
- Background images
- Customizer settings
- Navigation elements
- Promotional sections
The exact locations depend on your WordPress theme and configuration.
If an image is being used as part of your site’s design, deleting it from the Media Library can affect the appearance of multiple pages at once.
Don’t Delete Images Just Because WordPress Created Variations
WordPress commonly creates multiple image sizes when an image is uploaded. A single original image can therefore result in several files being stored on the server.
You may see files that appear to be duplicates because their names contain size-related suffixes. That doesn’t necessarily mean they should be individually deleted.
Themes and plugins can request different image sizes depending on where an image appears. A thumbnail, medium image, and larger version may all serve different purposes.
Deleting generated image files manually can therefore create missing-image problems or force regeneration later.
Review Your Image Sizes Before Changing Them
If storage is your main concern, you may be tempted to change WordPress image-size settings and remove existing generated files.
Be careful with this approach. Changing the settings affects future uploads; it doesn’t automatically mean old files should be deleted.
If you decide to reduce the number of generated sizes, first determine which sizes your theme and plugins actually use. Removing a size that is required for archive thumbnails or responsive layouts can make images disappear or display incorrectly.
A storage-saving change should be based on how the site actually uses images, not simply on the number of files in the uploads directory.
Large Original Images May Be the Real Problem
Sometimes the Media Library isn’t cluttered with unnecessary files. Instead, the problem is that the original uploads are much larger than they need to be.
For example, a camera photo might be several megabytes even though the website displays it at a much smaller size.
In that situation, deleting useful images isn’t the answer. Image optimization, resizing, or replacing oversized originals may produce a better result.
Before changing anything, make sure you understand how your optimization setup handles the original files. Some services keep backups or alternate versions, while others may replace files.
Don’t Replace Images Without Checking Their URLs
Replacing a large image can be useful, but filenames and URLs matter.
If you upload a new optimized image with a completely different filename, existing pages may continue pointing to the old image. You could end up with two files rather than actually solving the storage problem.
When changing an image that is already used throughout a site, use a method that preserves or properly updates the relevant references.
If you aren’t sure how a particular optimization plugin handles replacements, check its documentation before running a bulk operation.
Look for Old PDF and Document Uploads Too
Media cleanup shouldn’t automatically mean “image cleanup.”
PDFs, spreadsheets, presentations, ZIP files, audio files, and videos can consume considerably more storage than ordinary web images.
A forgotten 200 MB video can matter far more than dozens of small JPEG files. Sort or review media by type and identify large files that are clearly no longer needed.
But documents can also be linked directly from old articles, resource pages, menus, or downloadable-content sections. Verify their usage before deleting them.
Videos Need Extra Caution
Videos can be particularly expensive in terms of storage.
If your WordPress site contains uploaded videos, determine whether they’re actually hosted by WordPress or embedded from an external platform. A video embedded from another service doesn’t necessarily mean the video itself is consuming space in your WordPress uploads directory.
For videos that are hosted directly on your server, check whether they’re still embedded anywhere before deleting them.
If storage is becoming a recurring problem, moving video hosting to a suitable dedicated service may be more sustainable than repeatedly cleaning the Media Library.
Review the Uploads Folder Without Editing It
WordPress normally stores uploaded media under the wp-content/uploads directory, often organized into year and month folders.
Looking at this directory through your hosting file manager or SFTP can help you understand how much media exists and when it was uploaded.
However, don’t start deleting files directly from the uploads directory just because they aren’t visible in the current Media Library view.
The database and file system need to remain consistent. Removing files manually can leave attachment records pointing to files that no longer exist.
Use direct file deletion only when you understand exactly what you’re removing and why.
Database Cleanup Is a Separate Task
Media cleanup and database cleanup are related but shouldn’t be treated as the same operation.
Deleting an attachment through WordPress can remove its database record and associated file according to WordPress’s normal behavior. Database optimization plugins, however, may offer completely different cleanup functions.
Don’t run a broad “clean everything” operation just because you’re trying to reduce media clutter.
If the objective is specifically to remove unused media, keep the task focused. Database optimization can be assessed separately after you know what the site actually needs.
Check Broken Images After Cleanup
Never assume the cleanup worked correctly simply because the Media Library contains fewer files.
Visit important pages after a cleanup and look for missing images. Check your homepage, recent articles, important landing pages, category pages, and any pages that contain galleries or downloadable resources.
If you deleted a large group of files, use your website’s normal navigation rather than checking only one article.
A broken image may not appear on the page you expected because the same asset could have been used elsewhere.
What to Look For
Pay attention to:
- Empty image spaces
- Broken-image icons
- Missing featured images
- Incorrect thumbnails
- Missing downloadable files
- Broken gallery items
- Theme elements that no longer display correctly
If you discover a problem, restore the affected file from your backup rather than trying to guess which replacement image belongs there.
Clear Caches After Major Changes
Caching can make media cleanup confusing because your browser, WordPress caching plugin, CDN, or hosting platform may continue serving an older version of a page.
After a substantial cleanup, clear the appropriate caches and then test the site again.
Don’t clear every cache repeatedly while you’re still deleting files. Make the cleanup, verify the changes, then clear relevant caches once you have something meaningful to test.
If a CDN is involved, understand that its cached copy may persist for a while even after the original file has been removed from the server.
Be Careful With Image Optimization Plugins
Image optimization plugins can change how files are stored and served. Some create optimized versions, WebP or AVIF files, backups of originals, or other derivatives.
If you’re using one, understand its file-management behavior before manually deleting what appears to be a duplicate.
An image that looks unnecessary from the WordPress Media Library may be part of the optimization plugin’s workflow.
The safest cleanup is one that considers the entire image pipeline: original upload, generated sizes, optimized versions, caching, CDN delivery, and the page where the image is displayed.
A Better Way to Decide What Can Be Deleted
Rather than dividing media into “old” and “new,” classify potential cleanup candidates by confidence.
| Candidate | Risk Level | Recommended Action |
|---|---|---|
| Exact duplicate with confirmed unused copy | Low | Consider deleting |
| Unused test image you recognize | Low | Consider deleting |
| Old image from a deleted page | Medium | Verify no other references |
| Unattached image | Medium | Investigate first |
| Featured image | High | Verify its post usage |
| Theme logo/background | High | Check theme settings |
| Page-builder asset | High | Check templates and sections |
| Large video | High | Search for embeds first |
| Generated image-size variant | High | Don’t manually remove without understanding its role |
| Unknown system/plugin file | Very high | Leave it alone until identified |
The point isn’t that a particular category is always safe or dangerous. The evidence you have about a file’s use is more important than its label.
A Simple Cleanup Workflow
If your Media Library has become difficult to manage, work through it in stages rather than trying to clean the entire library in one session.
Stage 1: Establish a Safety Net
Create or verify a current backup of the database and website files.
Stage 2: Find the Obvious Waste
Look for recognizable test uploads, confirmed duplicates, abandoned campaign assets, and files belonging to content that has definitely been removed.
Stage 3: Investigate Unclear Files
Check featured images, page-builder content, widgets, theme settings, downloadable resources, and custom HTML where appropriate.
Stage 4: Remove Small Groups
Delete a manageable batch instead of thousands of files at once. This makes it easier to identify what caused a problem if something unexpectedly disappears.
Stage 5: Test the Website
Check important pages and functionality. Look for missing images, broken downloads, galleries, and design elements.
Stage 6: Continue Only When Everything Looks Normal
If the site works correctly, move to the next group. If something breaks, stop and restore the affected file before continuing.
This is slower than a bulk deletion button, but it dramatically reduces the chance of turning a simple storage cleanup into a website repair project.
What About Media Library Plugins?
Plugins can make large libraries easier to search, sort, identify, and manage. Some provide information that the standard WordPress interface doesn’t make particularly convenient to see.
They can be useful when a site contains thousands of media items, but don’t assume that a plugin’s “unused media” label is a guarantee that deletion is safe.
Before using a bulk-delete function, check exactly how the plugin determines whether a file is unused. A tool that only checks attachment relationships may not detect every custom reference.
For a production website, review the plugin’s documentation and make a backup before using bulk deletion.
Don’t Let Cleanup Become a Weekly Emergency
If the Media Library repeatedly becomes unmanageable, the bigger issue may be the site’s media workflow.
Set a few practical habits:
- Use descriptive filenames before uploading important assets.
- Avoid uploading the same image repeatedly in slightly different forms.
- Resize very large images before uploading when appropriate.
- Remove obvious test files after completing development work.
- Store large archives outside WordPress when they don’t need to be publicly served.
- Review large media files periodically.
- Keep important original files backed up separately when appropriate.
A little organization during publishing can prevent a much larger cleanup later.
A Note About Filenames
Renaming an existing image isn’t necessarily a harmless cleanup action. Pages may already reference the original URL, and changing the filename can create broken references unless they are updated correctly.
For new uploads, use clear, descriptive filenames from the beginning. For existing files, don’t rename them simply to make the Media Library look tidier unless you have a specific reason and a safe method for handling the resulting URL change.
Frequently Asked Questions
Can I delete unattached images from the WordPress Media Library?
Not automatically. “Unattached” does not guarantee that an image is unused. Check whether the file is referenced by posts, pages, featured images, templates, widgets, custom code, or plugins before deleting it.
Will deleting an image from WordPress break my posts?
It can if the image is still being used. A deleted image may disappear from articles, featured-image areas, galleries, widgets, or other parts of the site that reference it.
Is it safe to delete old images from the uploads folder?
Not simply because they are old. Directly deleting files from wp-content/uploads can leave WordPress or your content pointing to files that no longer exist. Verify usage before removing anything.
How can I find unused images in WordPress?
The Media Library’s unattached filter can provide a starting point, but it shouldn’t be treated as definitive. For important files, investigate actual usage through your posts, pages, templates, plugins, and site content.
Should I delete WordPress-generated image sizes?
Don’t manually delete them without understanding how your theme and plugins use those sizes. Different image sizes can be required for thumbnails, archives, responsive layouts, and other components.
Can I clean my Media Library without a plugin?
Yes. WordPress’s standard Media Library and your hosting tools are enough for careful manual cleanup. A plugin can make large libraries easier to manage, but it isn’t required.
Will deleting unused media improve WordPress performance?
It can reduce storage usage and make the Media Library easier to manage, but deleting unused files doesn’t automatically make every page load faster. Front-end performance depends on factors such as image dimensions, compression, caching, hosting, scripts, and page structure.
A Cleaner Media Library Without the Cleanup Headache
A well-organized Media Library isn’t necessarily one with the fewest files. It is one where you can understand what the files are, where they came from, and whether they’re still serving a purpose.
Start with a backup, then work from the safest candidates toward the uncertain ones. Confirm obvious duplicates, investigate unattached files instead of blindly deleting them, check featured images and theme assets, and treat page-builder content and generated image sizes with extra caution.
If you discover that your site is storing huge original images or large video files, address the underlying storage problem rather than deleting useful content. And after each meaningful cleanup, check the actual website—not just the Media Library—to make sure the pages still display as expected.
The safest WordPress media cleanup is not the one that deletes the most files. It’s the one that removes genuinely unnecessary data while leaving every required image, document, and site asset exactly where the website expects to find it.