
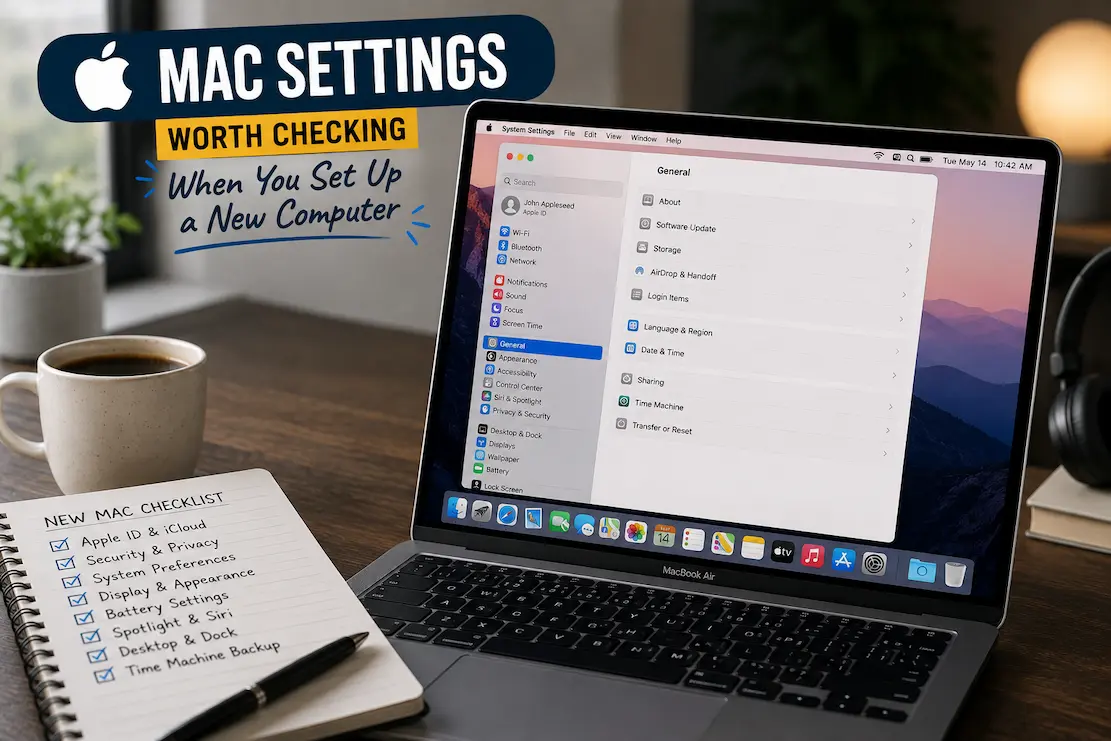
The mistake is trying to change everything before you have used the computer. That usually creates more confusion than improvement. A better approach is to finish the basic setup, spend a little time using the Mac, and then review the settings that can have a meaningful effect on everyday use. Some choices are worth making immediately; others can wait until you understand how the computer fits into your routine.
Menu names can also vary slightly between macOS releases, so don’t worry if a setting appears in a different place or has slightly different wording on your Mac. The important part is understanding what the setting controls and deciding whether the default makes sense for you.
Give Your Mac a Proper Software Update First
Before changing dozens of preferences, check whether macOS itself needs an update.
Open System Settings > General > Software Update and allow the Mac to check for available updates. A newly purchased computer may have been sitting in a warehouse or store for some time, so its installed version may not be the newest one available for that model.
Updates can include security fixes, bug corrections, driver and compatibility improvements, and changes to built-in applications. Installing one early also means you’re configuring the computer on the software version you’re actually going to use.
If an update requires a restart, let it finish before continuing with the rest of the setup. Some settings or system components can behave differently after a major update.
Check Automatic Updates Instead of Forgetting About Them
Software updates are not something you should have to remember manually forever.
Within System Settings > General > Software Update, review the automatic update options available on your version of macOS. You may see separate controls for macOS updates, security responses, system data files, and application updates.
For most people, leaving important security-related updates enabled is sensible. Delaying updates indefinitely can leave known vulnerabilities unresolved and may eventually create compatibility problems.
If you have a reason to control when major macOS upgrades occur—for example, because you rely on professional software that needs compatibility testing—you can be more selective about major version upgrades while still keeping important security updates current.
Turn On FileVault If It Fits Your Setup
FileVault provides full-disk encryption on supported Macs.
You can find it under System Settings > Privacy & Security > FileVault on current versions of macOS. When enabled, the contents of the Mac’s internal storage are encrypted so that someone who removes the storage or otherwise gains physical access to the computer cannot simply read the files without the necessary credentials or recovery mechanism.
This is particularly relevant for laptops because they are easier to lose or steal than desktop computers.
FileVault is not a replacement for your login password, and it doesn’t protect you from someone who is already legitimately logged into your account. It primarily addresses the risk associated with unauthorized physical access to the storage.
Before enabling or managing encryption, make sure you understand how your recovery method works. Losing access to both your account credentials and available recovery options can turn a security feature into a serious recovery problem.
Review Location Services Before Giving Every App Access
Many applications can request access to your location, but not all of them need it.
Go to System Settings > Privacy & Security > Location Services and review which applications have permission. You may find apps that genuinely need location information as well as others where the benefit is questionable.
Maps and certain weather applications have an obvious reason to request location access. A basic utility or document application may not.
Don’t think of location permissions as an all-or-nothing decision. Depending on the application and macOS version, you may be able to control access at the app or system-service level.
The useful question is simple: Does this application need to know where this Mac is for a feature I actually use?
Look Through Privacy & Security Before Installing Lots of Apps
A new Mac is a good opportunity to understand its privacy controls before your list of installed applications becomes large.
Open System Settings > Privacy & Security and look through the available categories. Depending on your Mac and macOS version, you may see controls covering contacts, calendars, photos, camera, microphone, files and folders, full disk access, accessibility, Bluetooth, and other resources.
You don’t need to disable everything.
Some applications genuinely require these permissions to perform their advertised functions. A video conferencing application may need the camera and microphone. A backup or file-management utility may need broader file access.
What matters is that permissions are granted deliberately rather than automatically because a dialog appeared during installation.
Pay Particular Attention to Camera and Microphone Access
Camera and microphone permissions deserve a quick review because they involve hardware that can capture information outside the screen.
Under Privacy & Security, check which applications are allowed to use the camera and microphone.
If you installed an application months ago and no longer use its recording features, there may be no reason for it to retain access.
macOS provides indicators when applications use certain hardware, but permission management is still worth checking periodically. Removing unnecessary access does not mean you can never use the feature again. If an application needs permission later, macOS can ask you again.
This is a good example of a setting where restricting access has little downside when the feature isn’t needed.
Decide What Appears on the Lock Screen
A new Mac can display notifications even when the computer is locked, depending on your configuration.
That can be convenient, but notifications may contain message previews, appointment details, email subjects, or other information that you don’t want visible to someone standing near the computer.
Review System Settings > Notifications and look at how notifications behave on the Lock Screen. For sensitive applications, you can adjust whether previews are shown or whether notifications appear at all.
There is no need to disable every notification. The better approach is to distinguish between information that is useful at a glance and information that should remain private until you unlock the Mac.
Don’t Let Every App Interrupt You
New computers often accumulate notifications quickly.
An application asks to send alerts, you click Allow, and suddenly the Notification Center contains messages from applications you barely use.
Go through System Settings > Notifications and remove unnecessary interruptions. Keep alerts that genuinely require your attention and reduce or disable those that simply compete for it.
Calendar reminders and important communication may deserve prominent alerts. A shopping application or game probably doesn’t need to interrupt you while you’re working.
This isn’t just about aesthetics. Fewer irrelevant notifications make important alerts easier to notice.
Choose a Sensible Default Browser
macOS includes Safari, but you may prefer another browser for work or specific applications.
If you install another browser, check System Settings > Desktop & Dock > Default web browser on current macOS versions and select the one you actually want.
This prevents links from unexpectedly opening in a browser you don’t use.
If you’re unsure which browser should be your default, leave Safari selected until you’ve used the alternatives for a while. There is no security requirement that forces you to replace Apple’s default browser.
Review iCloud Before Turning Everything On
iCloud can synchronize a considerable amount of information across Apple devices.
During setup, you may be offered options involving iCloud Drive, Photos, contacts, calendars, Safari information, passwords, and other data.
Don’t enable every option automatically just because you have enough iCloud storage to accommodate it.
Think about what you actually want synchronized. If you use another cloud service for work documents, you may not want duplicate storage arrangements. If your Mac is intended to contain a complete local photo library, your iCloud Photos choice should reflect that workflow.
Synchronization is convenient, but it also means a change on one device can appear on others. Understand what is being synchronized before relying on it as your only copy of important information.
Check iCloud Drive’s Desktop and Documents Setting
One iCloud option deserves particular attention: Desktop & Documents Folders.
When enabled, files stored on your Desktop and in Documents can be stored and synchronized through iCloud Drive.
That can be extremely useful if you move between Macs or want those files available on other Apple devices. But it can also surprise users who assume everything in those folders exists only on the Mac’s internal drive.
Before enabling it, understand how your storage is being used and where your files will appear.
If you later turn the feature off, follow Apple’s instructions carefully rather than simply deleting folders or moving files around randomly. Cloud synchronization settings can affect where local and synchronized copies are stored.
Set Up Time Machine Before You Need It
A new computer is the best time to establish a backup routine because there are no years of files to organize first.
macOS includes Time Machine, which can automatically back up your Mac to a compatible backup destination.
A backup is different from synchronization. iCloud can keep information available across devices, but that does not mean it replaces a complete backup strategy for everything stored on the Mac.
Connect an appropriate backup drive and configure Time Machine through System Settings > General > Time Machine, where available in your macOS version.
The most important part is not the configuration screen. It’s allowing the backup process to actually run regularly.
Don’t Treat the Mac’s Internal Storage as Your Only Copy
A new Mac can create a false sense of security because everything feels organized and untouched.
That changes quickly. After months of work, you may have photographs, projects, documents, downloaded files, application data, and other information that would be difficult to recreate.
A backup protects against more than hardware failure. Accidental deletion, software problems, theft, and other incidents can also make a backup valuable.
For especially important files, consider whether you need more than one backup method or location. A single backup drive sitting beside the Mac isn’t a complete answer to every possible failure scenario.
Review Battery Settings on a MacBook
If you’re setting up a MacBook, spend a few minutes reviewing battery-related settings.
Open System Settings > Battery and look at the available options. Current versions of macOS may provide information about battery health, energy usage, charging behavior, and optimization features.
Features such as optimized battery charging are designed to reduce unnecessary battery aging by adjusting charging behavior around your typical usage patterns.
Don’t disable battery-management features simply because a website claims that keeping a laptop at 100% all the time is better. Modern battery management is more sophisticated than that.
If you mostly use the Mac connected to power, the system’s battery-health features become particularly relevant.
Check Whether the Mac Is Sharing Its Screen or Files
Sharing features can be useful in offices and home networks, but they shouldn’t be enabled without understanding why they are active.
Go to System Settings > General > Sharing and review the available services.
Depending on your Mac and macOS version, these can include screen sharing, file sharing, remote login, media sharing, printer sharing, and other options.
If you’re using a personal Mac and have no reason to provide remote access or network services, unnecessary sharing options generally don’t need to be enabled.
If you do need one, configure it deliberately and understand which users or devices can access it.
Give AirDrop a Quick Privacy Check
AirDrop is convenient for moving files between Apple devices, but its receiving settings determine who can discover your Mac for AirDrop transfers.
You can review AirDrop through System Settings > General > AirDrop & Continuity.
For ordinary personal use, choosing a restricted receiving option when you’re not actively sharing files can reduce unnecessary exposure.
You don’t need to keep AirDrop completely disabled if you use it frequently. The important thing is knowing what your current receiving setting allows.
Review Bluetooth Connections
A new Mac may eventually accumulate keyboards, mice, headphones, speakers, controllers, and other Bluetooth devices.
Open System Settings > Bluetooth and remove devices you no longer use if the list becomes cluttered.
This isn’t usually a major security problem on its own, but removing old connections makes it easier to recognize unfamiliar devices and reduces confusion when troubleshooting connection problems.
If a device repeatedly connects when you don’t want it to, checking the saved Bluetooth device list is one of the sensible first steps.
Set Up Touch ID Properly
If your Mac has Touch ID, configure it during setup and consider adding an additional fingerprint if the system allows it and your workflow benefits from doing so.
Touch ID can be used for unlocking the Mac and authenticating certain actions without repeatedly typing the account password.
You should still know your account password. macOS will periodically require it for security reasons and after certain system events.
Touch ID is about convenience layered onto authentication, not a replacement for understanding your account credentials or recovery options.
Check Your Login Items
Some applications add themselves to the list of things that launch or run in the background when you log in.
Open System Settings > General > Login Items & Extensions and review what appears there.
If an application you barely use is launching every time the Mac starts, removing it from the appropriate login-item list can reduce unnecessary background activity and make startup cleaner.
Don’t remove every item simply to make the list empty. Some applications rely on background processes for notifications, synchronization, security, or hardware functionality.
The goal is to recognize what is running and decide whether you actually need it.
Review Keyboard Settings Before You Build Muscle Memory
Keyboard preferences can affect how comfortable the Mac feels every day.
Under System Settings > Keyboard, you can review settings related to key repeat behavior, keyboard shortcuts, input sources, dictation, and other options depending on your macOS version.
If you’re coming from Windows, some keyboard behaviors may feel unfamiliar. Rather than constantly adapting to defaults you dislike, take a little time to understand the available shortcuts and input settings.
A small change here can have a bigger effect on productivity than a collection of cosmetic interface tweaks because keyboard interactions happen constantly.
Choose Your Trackpad or Mouse Behavior
Trackpad settings are another area where personal preference matters more than a universal recommendation.
Open System Settings > Trackpad or Mouse and review tracking speed, scrolling behavior, secondary click options, gestures, and other available controls.
If the pointer feels too slow or too sensitive, fix it early instead of spending weeks compensating for the setting.
For trackpads, take some time to understand gestures. Features such as Mission Control and switching between spaces can become useful once they match the way you work.
Configure the Desktop and Dock for Less Clutter
The Dock can quickly fill with applications you rarely use.
Under System Settings > Desktop & Dock, you can adjust its size, position, magnification, automatic hiding, and other behaviors.
You don’t need to fill the Dock with every application you install. Keep the applications you launch frequently and use Spotlight, Launchpad, Finder, or another preferred method for everything else.
Automatic hiding can provide more screen space on smaller displays. Keeping the Dock visible may be more convenient if you frequently switch applications.
Again, this is a workflow decision rather than a performance trick.
Decide How the Desktop Should Behave
The desktop can either be a working area or a dumping ground.
macOS provides settings that influence how items such as external drives and other devices appear on the desktop. You can also use Finder settings to control which categories are displayed.
If you prefer a clean desktop, turn off items you don’t need to see there and keep files organized in appropriate folders.
If you frequently access external drives, keeping them visible may save time.
There is no productivity award for having an empty desktop. The useful arrangement is the one that makes frequently needed items easy to reach without turning the screen into a collection of random files.
Review Finder’s Default Behavior
Finder deserves its own setup because you’ll use it constantly.
Open Finder and review Finder > Settings. Depending on your macOS version, you can adjust which items appear in the sidebar, how new Finder windows behave, and other browsing preferences.
Consider setting the sidebar around locations you actually use. Remove clutter from the sidebar if it makes navigation harder.
You can also choose what a new Finder window shows. Some people want Recents or Home; others work mainly from a specific folder or storage location.
This is one of those settings where spending five minutes early can save hundreds of small navigation steps later.
Decide Whether You Want File Extensions Always Visible
macOS can hide filename extensions for known file types, similar to other operating systems.
In Finder, you can review extension-related behavior through Finder > Settings > Advanced, depending on your macOS version.
If you frequently work with different file formats, showing extensions can make file management clearer.
If you mostly work with ordinary documents and don’t need to think about extensions, Apple’s default presentation may be perfectly adequate.
For people who troubleshoot files, move data between applications, or work with technical formats, visible extensions can provide useful context.
Review Spotlight and Search Locations
Spotlight can search through files, applications, messages, and other information on your Mac.
Under System Settings > Siri & Spotlight, you can review categories and search behavior available on your system.
If you rarely want certain types of information appearing in search results, you can adjust the relevant settings.
Privacy-conscious users may also want to understand which locations are indexed. Avoid randomly disabling indexing simply because someone claims it makes a Mac faster. Spotlight is an important part of macOS, and unnecessary changes can make searching less useful.
If you have a specific privacy or organizational reason to exclude a location, configure that purposefully.
Turn on Find My Mac
If your Mac supports Apple’s Find My functionality, make sure you understand its role before dismissing it as another optional feature.
Find My can help locate compatible Apple devices and provides features intended to help protect them if they are lost.
The feature relies on your Apple Account and associated services, so make sure your account credentials and recovery options are in good order.
For a portable Mac, this is one of the settings worth taking seriously. Losing a laptop is not just a hardware problem; it can also expose locally stored information if the computer isn’t properly protected.
Check Your Apple Account Recovery Information
A new Mac setup is a good opportunity to confirm that you can actually recover your Apple Account if something goes wrong.
Review your account information and available recovery methods rather than assuming you’ll remember everything years later.
This matters because many Apple services are connected through the same account. Losing access can affect iCloud data, device features, purchases, synchronization, and other services.
Don’t store recovery information in an insecure note on the same Mac you’re trying to protect. Use Apple’s supported recovery mechanisms and keep important recovery information somewhere you can access if the Mac becomes unavailable.
A Practical New-Mac Checklist
If you don’t want to work through every System Settings category, prioritize these areas:
| Setting | Why Check It |
|---|---|
| Software Update | Keeps macOS current and addresses security issues |
| FileVault | Protects data stored on the Mac if physical access is lost |
| Location Services | Controls which apps can access location |
| Camera & Microphone | Limits unnecessary hardware access |
| Notifications | Reduces unwanted interruptions and lock-screen exposure |
| iCloud | Determines what data synchronizes |
| Time Machine | Establishes a proper backup routine |
| Battery | Helps manage MacBook charging and battery health |
| Sharing | Prevents unnecessary network services |
| AirDrop | Controls who can discover the Mac for transfers |
| Login Items | Prevents unnecessary applications from launching |
| Finder | Makes everyday file navigation more efficient |
| Keyboard/Trackpad | Adapts the Mac to your working style |
| Find My | Helps with locating and protecting a lost Mac |
You don’t need to make all these changes immediately. Some are decisions you make once and rarely revisit; others are worth checking periodically.
Frequently Asked Questions
What should I do first when setting up a new Mac?
Start by completing the Apple Account setup, checking for macOS updates, and establishing your backup approach. After that, review privacy, security, synchronization, and everyday usability settings.
Should I turn on FileVault on my Mac?
For many Mac users, especially those with laptops, full-disk encryption is a useful security measure. Before enabling or relying on it, make sure you understand your password and recovery options.
Do I need to change the default Mac settings?
No. macOS defaults are designed to work for a broad range of users. Change settings because they solve a particular problem or match your workflow, not simply because they’re different from someone else’s configuration.
Should I use iCloud Drive on a new Mac?
It depends on how you manage files and other Apple devices. iCloud Drive is useful for synchronization, but you should understand which folders and data will be synchronized before relying on it.
Does iCloud replace Time Machine?
No. Synchronization and backup serve different purposes. iCloud can keep information available across devices, while Time Machine is designed to maintain backups that can help recover files and system data.
Should I allow every app to use my Mac’s location?
No. Review location permissions individually and allow access when an application genuinely needs it for a feature you use.
What Mac privacy settings should I check first?
Location Services, Camera, Microphone, Files and Folders, Full Disk Access, Accessibility, Contacts, Photos, and other permission categories are useful places to start. The exact categories vary by macOS version.
Should I disable all Mac startup applications?
Not necessarily. Some background applications provide useful synchronization, security, hardware, or notification functions. Remove only the items you recognize and don’t need.
Why should I review Sharing settings on a new Mac?
Sharing features can expose files, screens, or other services to other users or devices. If you don’t need a particular sharing service, leaving it disabled can keep the computer’s network exposure simpler.
Is it necessary to customize Finder on a new Mac?
No, but Finder settings can make a significant difference if you manage many files. Adjusting the sidebar, default window location, and extension display can reduce repetitive navigation.
Set Up the Mac Around Your Actual Habits
A new Mac doesn’t need a dramatic configuration overhaul. Most of the worthwhile work is simply making sure the computer isn’t quietly doing things you don’t need and that important protections are in place before you start filling it with years of data.
Update macOS, establish backups, understand FileVault and account recovery, review permissions, and decide what should synchronize through iCloud. Then move into the everyday settings: Finder, the Dock, keyboard, trackpad, notifications, and login items.
Some settings will become obvious only after you’ve used the computer for a few days. That’s fine. A good Mac setup isn’t about changing the largest number of options; it’s about making a small number of deliberate choices that keep your data protected, your backups dependable, and the computer comfortable to use.